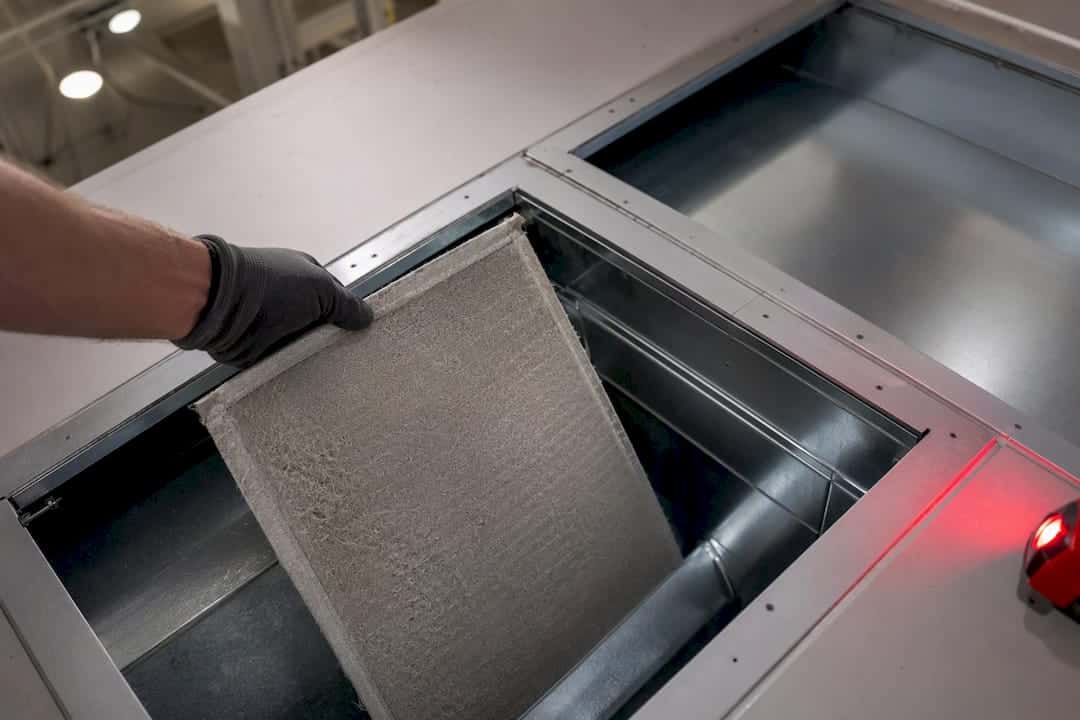
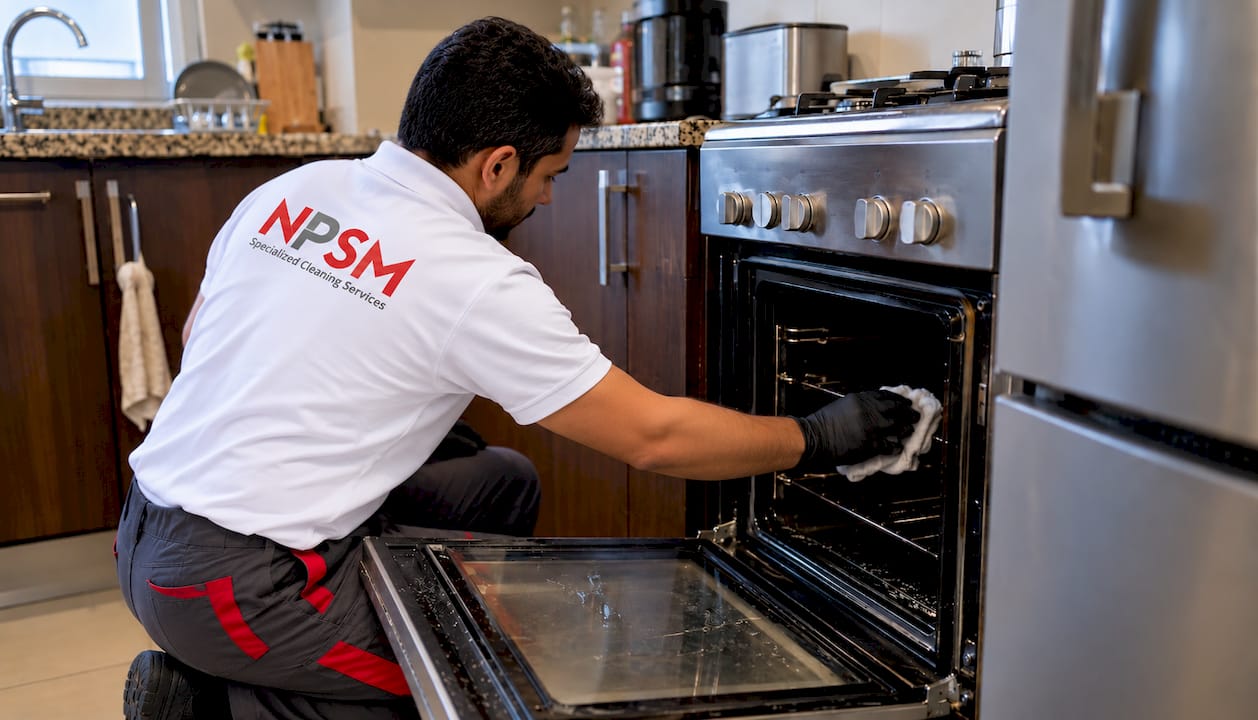
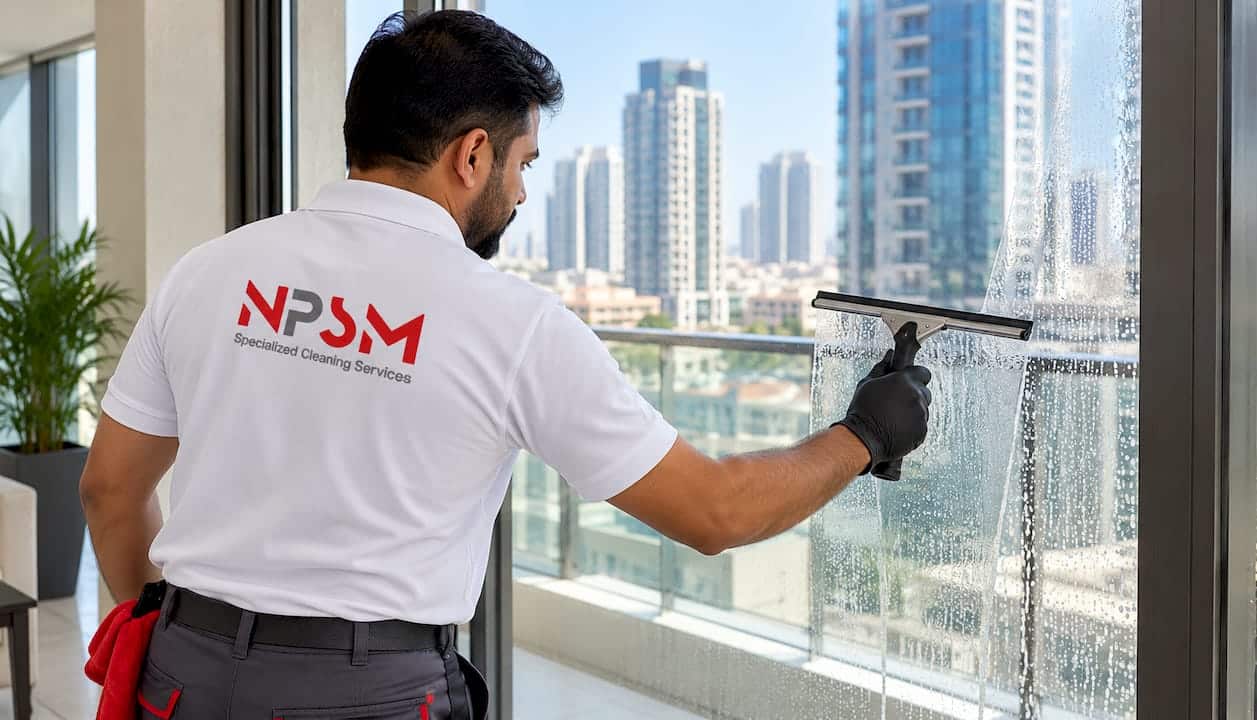
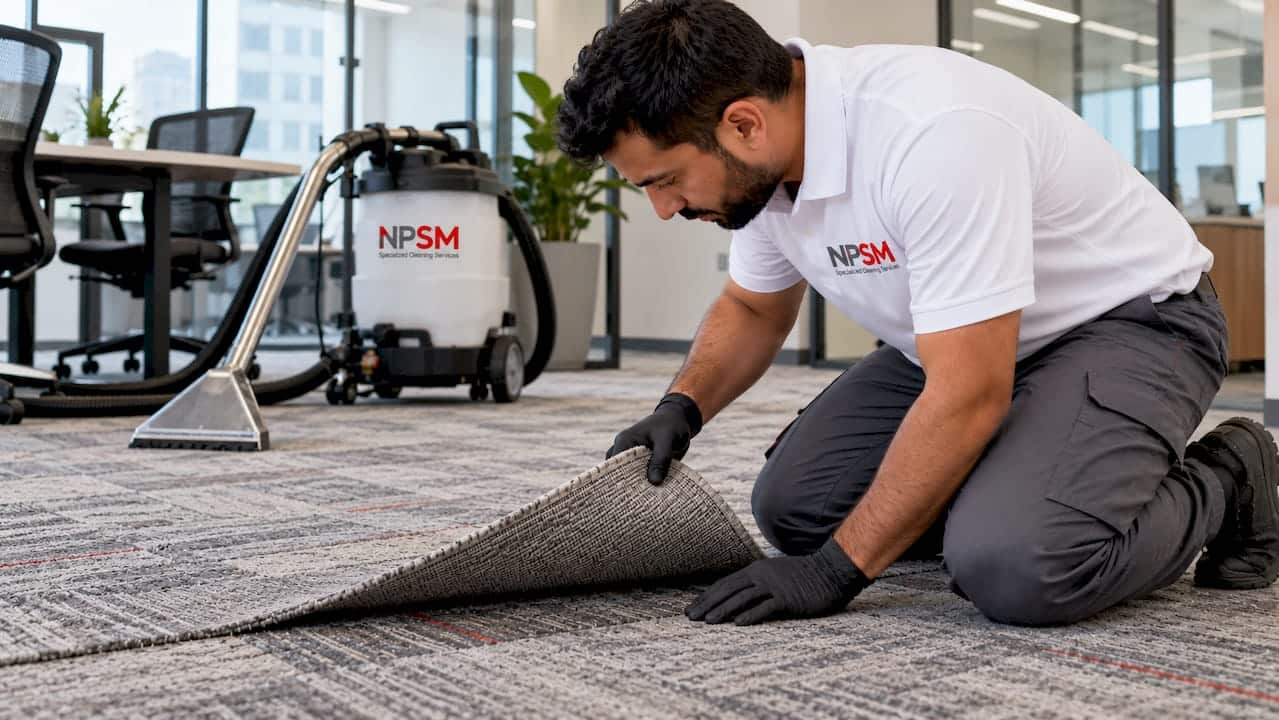
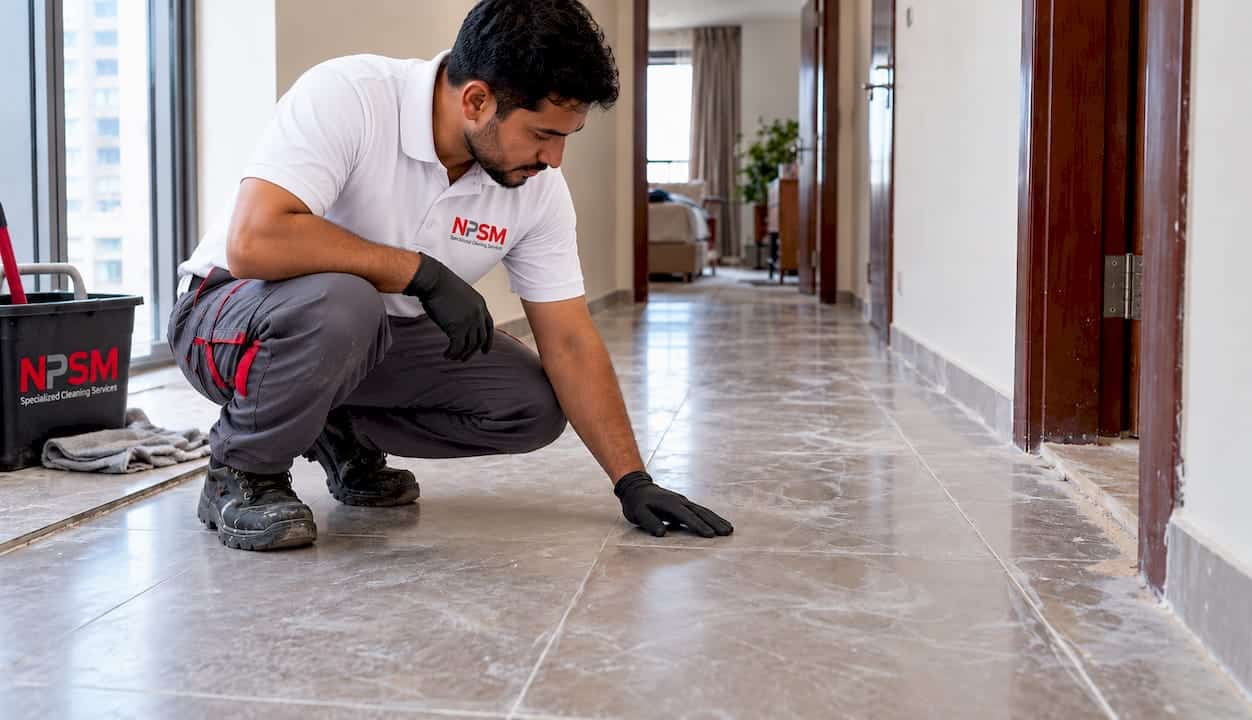
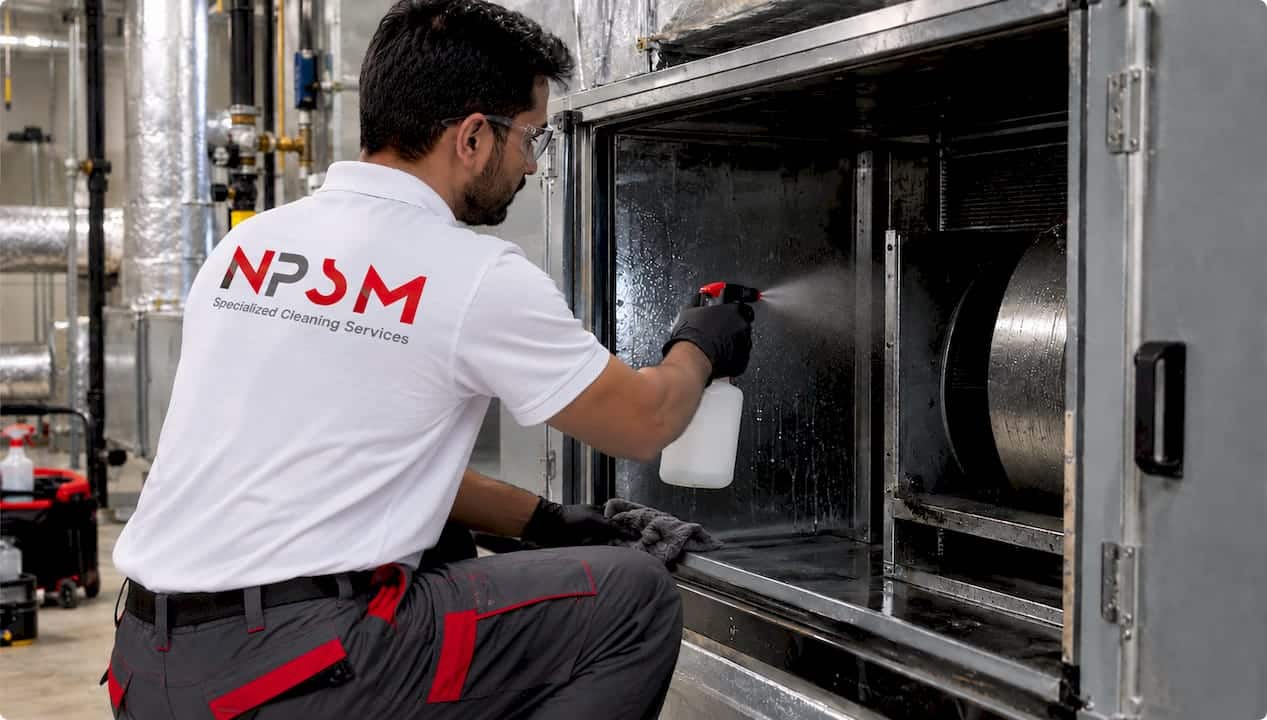
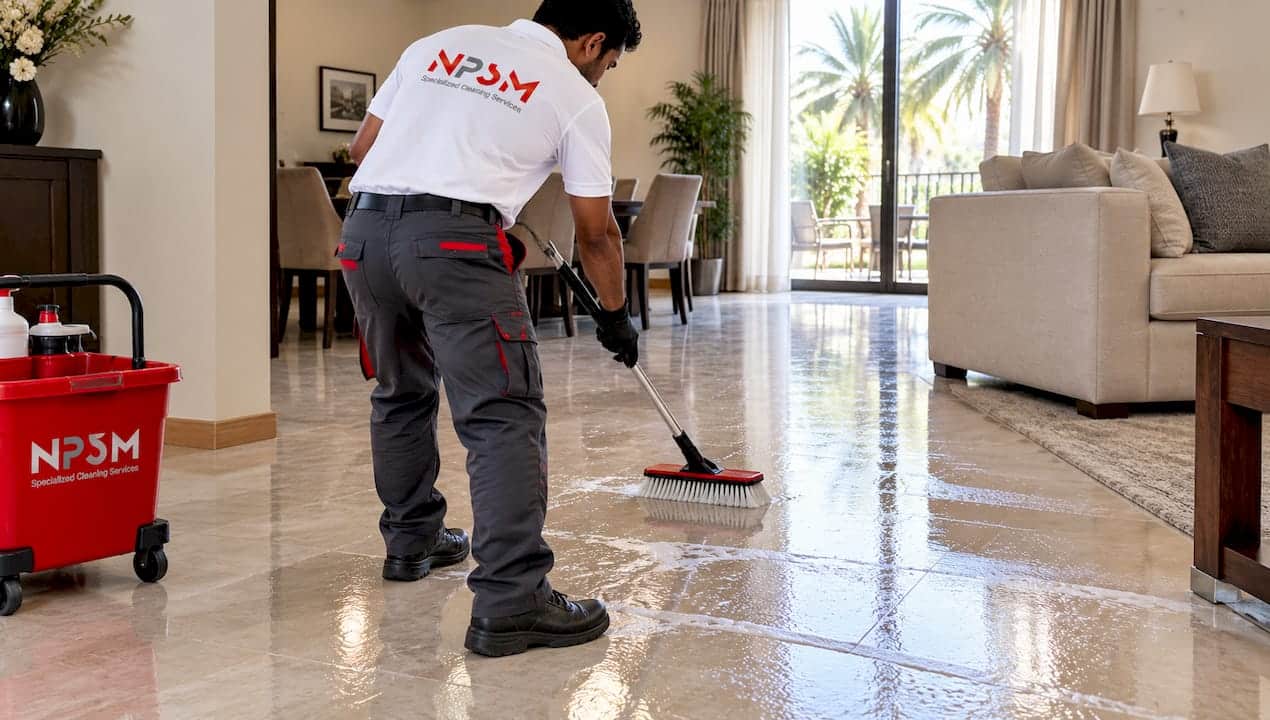
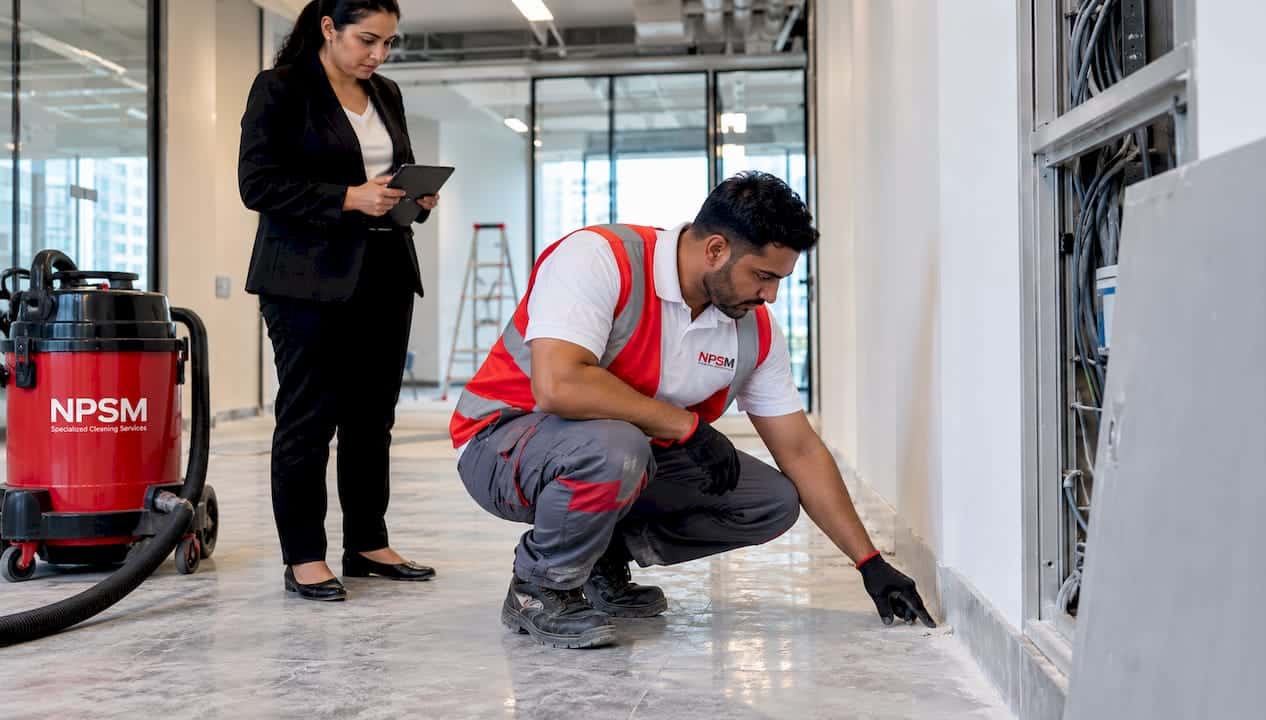
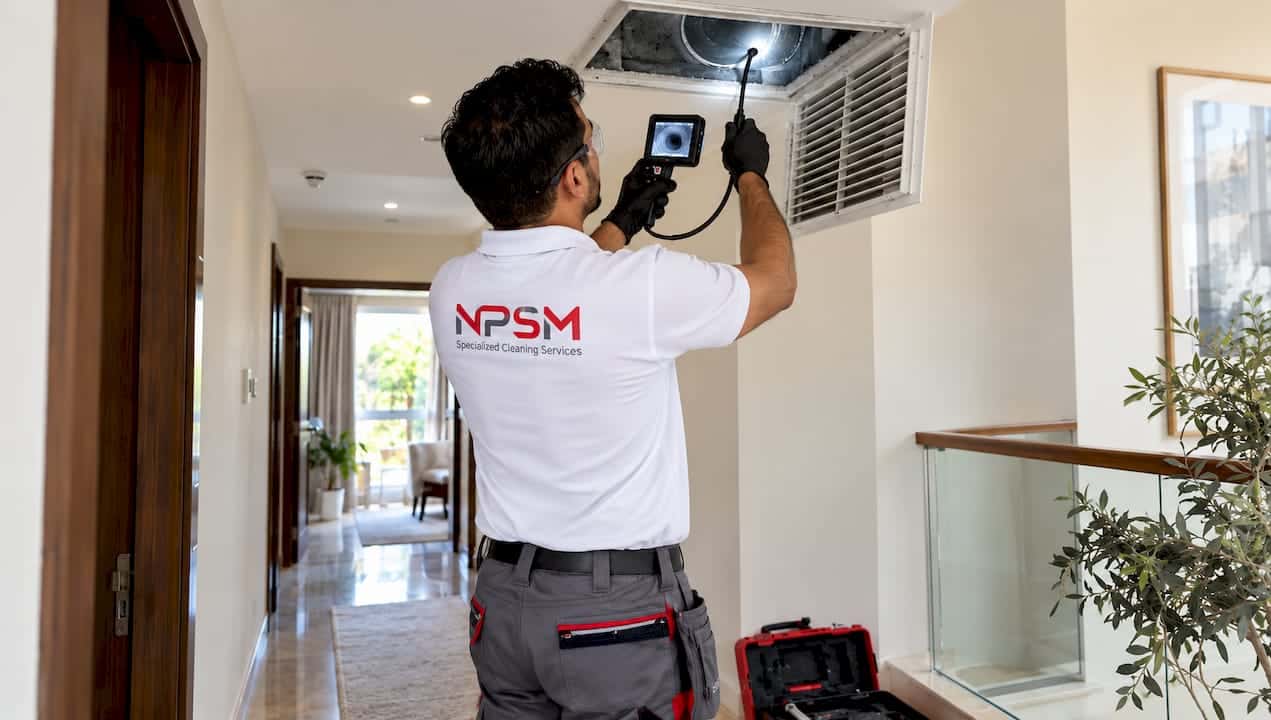
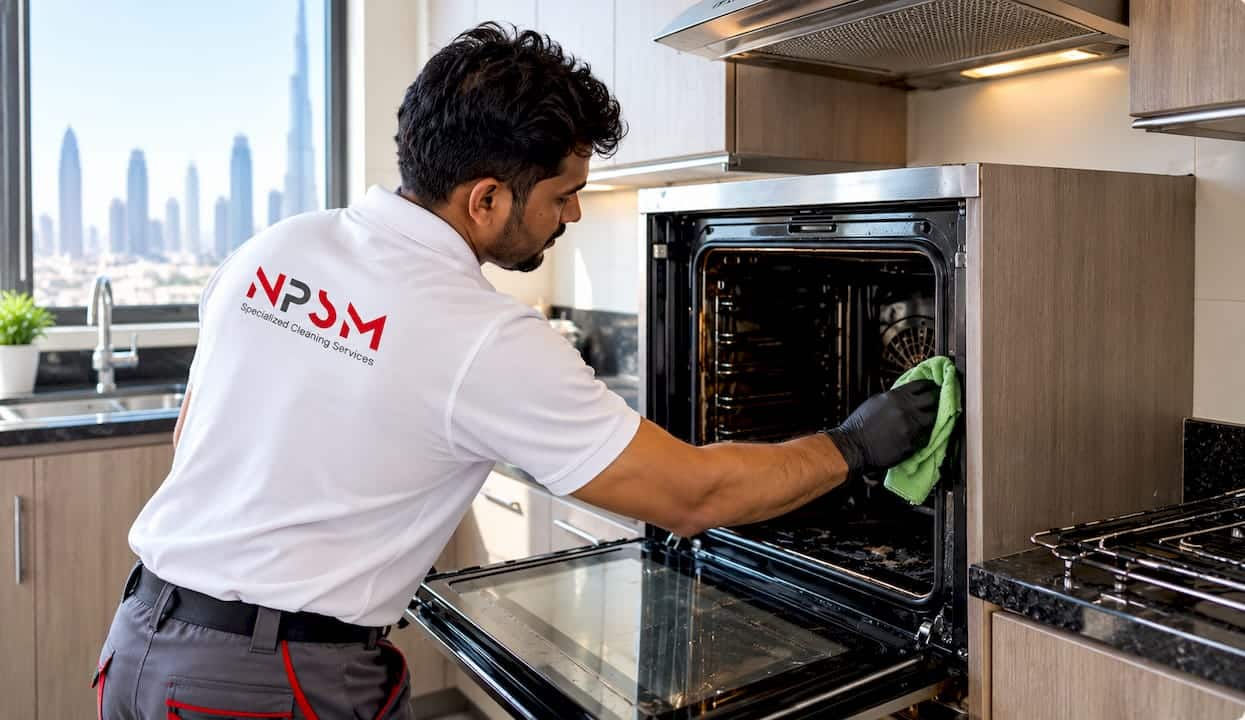
Post-construction cleaning most often fails at the same spots: air vents and HVAC filters, the tops of cabinets and crown moulding, window tracks and weep holes, behind and under appliances, light fixtures, and grout lines. The single highest-priority action is checking and replacing HVAC filters and cleaning the registers, since trapped dust there affects air quality long after visible surfaces look spotless. Property managers should run this checklist before handover; cleaning professionals should run it before calling a job complete.
TL;DR:
HVAC filters and ductwork must be thoroughly inspected, replaced, and properly sealed before handover to prevent ongoing dust circulation and microbial growth.
All high and hidden surfaces, including vents, crown moulding, window tracks, behind appliances, and grout lines, require detailed, area-specific cleaning to remove trapped dust and debris.
A professional duct cleaning and inspection are necessary if there is visible contamination, mold, or persistent dust that standard methods cannot address reliably.
Final handovers should include documented inspections, filter replacements, and photos, especially for commercial spaces with sensitive equipment or high cleanliness standards.
Standard cleaning companies typically do not have the equipment for deep HVAC or ductwork cleaning; specialized services are recommended for thorough, long-lasting results.
Specializedcleaning
Specialized Cleaning For Cleaner Handover
Professional cleaning solutions for post construction spaces, HVAC ductwork, residential properties, and commercial environments in Dubai.
1. The itemized checklist cleaning teams keep skipping
Construction dust does not settle evenly. It clings to horizontal ledges, gets trapped behind fixed appliances, and packs into channels never meant to hold debris. A methodical, area-by-area pass catches what a general wipe-down misses.
Air vents, ducts and return grilles: dust and drywall particles collect inside registers during construction. Remove grilles with a screwdriver, vacuum the visible duct opening with a HEPA-filtered wand, wash the grille in warm soapy water, and dry before reinstalling. Budget adequate time per vent to ensure thorough cleaning.
Tops of cabinets, door frames and crown moulding: these horizontal ledges trap fine dust that commonly accumulates on high ledges and door frames and gets missed because it sits above eye level. Use appropriate vacuum tools such as a telescoping wand from a stable step stool, then follow with a damp microfiber cloth.
Window tracks, sills and weep holes: drywall dust and paint chips settle into tracks and block drainage channels. Vacuum loose debris first, then use a stiff brush or a folded card to clear weep holes, finishing with a damp cloth along the sill.
Behind and under appliances and fixed units: installers often leave sawdust, screws and packaging fragments behind refrigerators, ranges and vanities. Pull units out where it is safe to do so, vacuum the floor and the appliance’s rear vents, then wipe down before sliding back into place.
Baseboards, skirting boards and grout lines: dust settles into every seam at floor level, and grout haze from tile work often goes unnoticed until it dries hard. Wipe baseboards with a microfiber cloth, then scrub grout with a stiff nylon brush and a neutral cleaner, spot-treating any silicone residue with a plastic scraper.
Cabinet and closet interiors, drawers and hardware: sawdust and packaging residue collect on shelves, in drawer tracks and on hinges. Empty each cabinet, vacuum corners and tracks, then wipe hardware with a damp cloth.
Light fixtures, ceiling fans and recessed fittings: dust settles on fan blades, fixture housings and diffusers, dulling light output. Turn off power at the breaker before touching any fixture, then dust with a microfiber wand and wipe glass covers separately.
Switch plates, outlet covers and electrical fixtures: fingerprints, paint spatter and dust build up around every switch and outlet. Wipe with a barely damp cloth, never a wet one, and avoid spraying cleaner directly onto the plate.
Walls and corners: cobwebs, dust and stray paint splatter collect in upper corners and along wall edges. Use a soft-bristle extension duster for cobwebs, then a magic eraser or mild solvent for paint spatter, testing on a small area first.
Flooring edges and under thresholds: dust and adhesive residue pack into the gap where flooring meets a threshold or transition strip. Use a thin scraper to lift dried adhesive, then vacuum the gap before a final mop pass.
Construction adhesives and sealant residue: leftover caulk beads, tape residue and adhesive smears on glass or tile need a dedicated pass. A plastic scraper handles most residue; a citrus-based adhesive remover lifts what scraping leaves behind.
Plumbing fixtures and drains: sinks, faucets and drains collect grout dust, metal shavings and sealant during installation. Run water through each drain, inspect for slow flow, and polish fixtures with a non-abrasive cleaner.
A few essentials apply across every item on this list:
Wear a properly fitted dust mask or respirator, safety glasses and gloves when handling settled construction dust.
Use a stable ladder or step stool for anything above shoulder height, and never lean on cabinetry for extra reach.
Turn off power at the breaker before cleaning any light fixture, ceiling fan or outlet cover.
Keep a separate cloth or pad for wet areas versus dry dusting to avoid smearing fine debris.
Pro Tip:Clean high to low, room by room. Dust dislodged from ceiling fixtures and crown moulding settles on lower surfaces, so finishing baseboards and floors last, with a clean tack cloth for the final wipe, prevents redoing work you already finished.
2. HVAC, ducts and filters need standards-based verification
Air handling systems are the part of a post-construction clean that hides the most and shows the least. Dust, drywall particles and fine debris drawn into ducts during construction can circulate through occupied space for months if filters and registers are not addressed before handover. The EPA’s building air quality guidance treats HVAC cleanliness as central to preventing microbial growth and maintaining airflow, and recommends sealing and inspecting ducts before a building returns to normal occupancy.
During construction, ducts and registers should be sealed and protected with temporary covers, and a temporary filter installed to catch drywall dust and debris before it reaches the system. The EPA’s technical bulletin on duct protection recommends sealing duct openings for the duration of construction and replacing filters once work is complete, before the system runs at normal capacity.
Duct cleanliness is treated as both a health and an operational issue. Unprotected ducts can trap enough construction debris to affect airflow and increase microbial risk if moisture is present.
Before signing off on any post-construction job, confirm:
All temporary duct seals and covers have been removed and registers reinstalled correctly.
Filters have been replaced with a clean unit of the correct size and rating, not just inspected.
Visible duct openings and return grilles show no residual drywall dust or debris.
Any signs of contamination or reduced airflow are flagged for a professional duct cleaning rather than a standard wipe-down.
Keep filter model numbers, replacement dates and any duct inspection photos as part of the handover file.
3. When a specialist should take over from the standard clean
Some jobs go past what a general cleaning crew is equipped to finish safely. Visible mold or heavy dust inside ductwork, data center environments with sensitive equipment, thick sanding residue on hard surfaces, or fine dust that keeps reappearing after a standard clean are all signs to bring in a specialist rather than repeat the same steps.
NPSM Specialized Cleaning Services LLC has worked on residential and commercial post-construction sites in Dubai for over 15 years, using licensed staff and specialized equipment for tasks like HVAC duct cleaning and data center cleaning, with same-day scheduling available for urgent handovers.
A useful brief to any contractor covers:
The exact scope: which rooms, systems or fixtures are included and which are excluded.
Inspection checkpoints the contractor walks through with you before sign-off.
Documentation to request: before-and-after photos, filter model numbers, and a signed statement confirming debris removal.
4. Setting priorities across property types
Safety and air quality come first on every job: sealed ducts, replaced filters, cleared weep holes. Visible surfaces come next, since they shape the client’s first impression. Hidden zones, cabinet interiors, behind appliances, come last because they take longer to find and confirm.
Residential handovers can usually proceed once air quality checks pass. Commercial spaces, especially those with sensitive equipment, sometimes warrant a short delay if duct contamination is visible. The habit that prevents most repeat visits: a signed final inspection checklist, room by room, before anyone calls the job done.
— Qadir
5. Matching the checklist to a professional cleaning service
Recognizing a missed spot is one thing. Fixing it properly, especially inside ductwork or behind heavy fixtures, often calls for equipment a standard cleaning kit does not include.
NPSM Specialized Cleaning Services LLC handles the parts of this checklist that need dedicated tools: HVAC duct cleaning for filter and duct verification, and post-construction deep cleaning for heavy dust, grout haze and adhesive residue across a full site. A typical engagement runs through a site inspection, a scoped quote, the cleaning itself, and a handover document listing what was checked and cleaned.
Vents and airflow issues route to the HVAC duct cleaning team.
Heavy residue, grout haze or sanding dust routes to the post-construction deep cleaning service.
Ongoing office maintenance after handover can move to a standard janitorial contract.
If your site is heading toward handover and any item on this checklist looks unresolved, request a free consultation and get a same-day scheduling option for the areas that need a specialist pass.
Sources
Guidance on HVAC maintenance and indoor air quality (IAQ) is drawn from the EPA’s building air quality guide and its duct protection technical bulletin. The identification of commonly overlooked cleaning areas and the recommended order of tasks are informed by Good Housekeeping’s expert list of frequently missed spots and Dyson’s research on hidden dust accumulation. For homeowners evaluating the benefits of duct cleaning, this air duct cleaning primer offers useful insights.
FAQ
What is included in post-construction cleaning?
Post-construction cleaning covers dust and debris removal from every surface, including vents, ledges, window tracks, appliance surrounds and grout lines, along with adhesive and sealant residue removal. It typically finishes with a detailed inspection to confirm nothing was missed before occupancy.
What is the 20/10 rule for cleaning?
The 20/10 rule is a general tidying method involving set periods of cleaning and resting, repeated in cycles. It is a household productivity habit rather than a construction-cleaning standard, so it does not replace an area-by-area post-construction checklist.
What are the 7 stages of cleaning?
Definitions vary by industry, but a common version for post-construction work runs: rough clean, debris removal, dusting, vacuuming, detail cleaning of fixtures and vents, floor cleaning, and a final inspection pass. Each stage targets a different layer of construction residue before the space is considered ready.
What is the purpose of post-construction cleaning?
Post-construction cleaning removes fine dust, debris and residue left behind by building work so the space is safe, breathable and presentable for occupancy. It also protects HVAC systems and finished surfaces from long-term damage caused by trapped construction dust, as outlined in EPA guidance on building air quality.
Deep cleaning means a thorough cleaning process that reaches beyond the surfaces a routine wipe-down covers, targeting buildup, grime, and hidden dirt in spots that get skipped during regular upkeep. It typically includes degreasing kitchens, scrubbing grout, sanitizing high-touch surfaces, and cleaning inside appliances, vents, and behind furniture. The Oxford English Dictionary defines it simply as a thorough cleaning beyond routine maintenance, which is the distinction that matters most.
TL;DR:
Most households benefit from deep cleaning two to four times yearly, while moves, renovations, mold, pests, or persistent odors warrant immediate service.
Request a written checklist for every room and confirm exclusions before booking because inside oven and refrigerator cleaning may cost extra.
When budgets are tight, clean kitchens and bathrooms first, then address vents and floors if funds allow, because these zones most affect hygiene.
Cleaning time depends more on a property’s condition than its size, while neglected grout, blinds, and baseboards add labor, and some first visits carry surcharges.
Specializedcleaning
Get a Thorough Clean in Dubai
Specializedcleaning provides professional deep cleaning for homes and businesses in Dubai, with experienced staff and specialized equipment for complex cleaning needs.
Deep cleaning isn’t a fixed, standardized service. Providers define their own scope, and what one company calls a deep clean, another might call a “detail clean” or “intensive clean.” That said, most professional deep cleans share a common thread: they target the buildup that accumulates over weeks or months and skips the areas a quick tidy never reaches.
A typical deep clean goes after:
Grease and grime buildup on stovetops, range hoods, and backsplashes
Grout lines, tile seams, and baseboards that trap dust and residue
Interior surfaces of ovens, refrigerators, and microwaves
Air vents, ceiling fans, and light fixtures that collect dust over time
High-touch surfaces like door handles, light switches, and cabinet pulls that need disinfecting, not just dusting
People usually schedule a deep clean around a specific trigger rather than on a whim. Moving into or out of a property is the most common reason, followed by post-renovation cleanup, preparing for a big event, or simply resetting a home that hasn’t had a proper scrub in a while. Office spaces often book one ahead of an inspection or after a long stretch without professional attention.
Deep cleaning vs. routine cleaning and housekeeping
Routine cleaning keeps a space looking presentable week to week. Deep cleaning resets it by addressing what regular upkeep leaves behind.
Scope: Routine cleaning covers visible surfaces, floors, and counters; deep cleaning reaches inside appliances, behind furniture, and into grout lines and vents.
Frequency: Routine cleaning happens weekly or biweekly; deep cleaning is typically scheduled a few times a year or around specific triggers.
Tools: Routine cleaning relies on general-purpose sprays and vacuums; deep cleaning often calls for degreasers, grout brushes, and sometimes industrial extractors.
Outcome: Routine cleaning maintains appearance; deep cleaning removes buildup that affects hygiene, air quality, and the condition of surfaces over time.
A home that gets weekly cleaning can still accumulate grease behind the stove, mineral scale in the tank, or dust inside vents for months. That’s the gap deep cleaning closes, and it’s why move-ins, post-construction cleanups, and seasonal resets almost always call for it instead of a standard tidy.
Room-by-room deep cleaning checklist
A useful way to evaluate any quote, or brief a cleaner yourself, is to walk through the job zone by zone. Working room by room instead of task by task helps maintain quality and avoid the fatigue that leads to skipped spots on longer jobs,
Kitchen: Degrease the stovetop, hood, and backsplash, clean inside the oven and refrigerator, scrub grout, and wipe down cabinet fronts and handles.
Bathrooms: Scrub tile and grout, remove soap scum and limescale, disinfect the toilet base and handle, and clean exhaust fans.
Bedrooms and living areas: Dust baseboards, blinds, and ceiling fans, vacuum under furniture, and wipe down light switches and remote controls.
Floors: Vacuum and mop all surfaces, edge-clean along baseboards, and treat carpets or rugs that trap odor and allergens.
Special systems: Address HVAC ducts, water tanks, and carpets separately since these need dedicated equipment rather than a general wipe-down.
When time or budget is tight, prioritize the kitchen and bathrooms first since these zones affect hygiene the most, then move to vents and floors if the budget allows.
Pro Tip:Ask any cleaner, in-house or professional, for a written room-by-room checklist before the job starts. It prevents disagreements later about what was or wasn’t included, especially around inside-appliance work, which some providers treat as an add-on.
Most households benefit from a deep clean two to four times a year, with busy homes or those with pets and kids leaning toward the higher end. Certain triggers call for one immediately regardless of schedule: moving in or out, finishing a renovation, or noticing mold, pest activity, or a persistent odor.
Duration depends more on condition than size. A property that hasn’t been professionally cleaned in a year takes longer than a larger space cleaned regularly, since heavily soiled grout, blinds, and baseboards demand manual scrubbing time that square footage alone doesn’t predict.
Pricing factors to expect:
Property size and layout, including the number of bathrooms and kitchens
Current condition, since neglected surfaces take longer to restore
Add-on services like HVAC duct cleaning, carpet extraction, or water tank disinfection
An “initial clean” surcharge some providers apply to a first-time deep clean, since it typically requires more labor than a maintenance visit thereafter
A practical approach to deep cleaning is to work zone by zone to maintain consistent quality across a long job, a point Martha Stewart’s checklist also emphasizes for homeowners tackling the work themselves.
Why hiring a professional changes the outcome
A professional crew brings equipment that most households don’t own: industrial extractors, HEPA-filtered vacuums, and the tools needed for HVAC duct work that a general cleaning kit can’t replicate. Licensed staff also follow safety and infection-control protocols that matter when disinfectants, degreasers, or duct work are involved.
What separates a professional deep clean from a DIY weekend:
Equipment built for grease, grout, and buildup that household tools can’t fully remove
Trained staff who follow safety protocols around chemicals and confined spaces like ducts or tanks
A documented scope of work that confirms exactly what’s included before the crew arrives
Before booking, request a written checklist and confirm exclusions upfront, the same advice that applies whether you’re hiring a large facility service or a residential crew. Our own HVAC duct cleaning service is a good example of the kind of specialized work that benefits from trained staff and purpose-built equipment rather than general cleaning supplies.
A practical recommendation before you book
The single best step before any deep clean is asking for a written, room-by-room checklist and confirming exclusions upfront, inside-fridge and inside-oven work especially. For busy households, I’d prioritize kitchens, bathrooms, and vents over everything else since these affect daily hygiene the most, even if the full checklist waits for next time.
— Qadir
How we handle deep cleaning for homes and offices in Dubai
Our deep cleaning services address key areas such as degreasing, grout restoration, inside-appliance cleaning, and the specialized work that routine housekeeping often misses. Our scope runs from standard residential deep cleans to move-in/move-out jobs, post-construction cleanup, and full office resets, with HVAC duct cleaning available as an add-on for anyone concerned about air quality or dust buildup in vents.
Many jobs start with a consultation to review a written checklist before scheduling, and some providers offer same-day scheduling for urgent jobs. If you’d rather compare options first, shows how a similar checklist approach looks in a different market. For Dubai homes and offices, request a quote on our deep cleaning page and we’ll confirm scope, timing, and price before a single surface gets touched.
FAQ
What is usually done in a deep cleaning?
A deep clean typically covers degreasing kitchen surfaces, scrubbing grout, disinfecting high-touch points, and cleaning inside appliances, vents, and behind furniture. The exact scope varies by provider, so confirming a written checklist before booking is the most reliable way to know what’s included.
How long does it normally take to deep clean a house?
Duration depends more on a property’s condition than its size, since heavily soiled grout, baseboards, and blinds require manual scrubbing time that square footage alone doesn’t predict. A property that hasn’t had a professional clean in a year will generally take longer than a larger space cleaned on a regular schedule.
What does a full house deep clean include?
A full house deep clean covers every room, including kitchen degreasing, bathroom grout and limescale removal, dusting baseboards and ceiling fans, and vacuuming under furniture. It can also include special systems like HVAC ducts, carpets, or water tanks when those are added to the scope.
The fastest safe fix for most balcony glass stains is a diluted white vinegar or mild window-cleaner rinse, applied with a soft cloth and finished with a squeegee. Avoid anything abrasive, including razor blades or scouring pads, since they risk permanent scratches. If a cloudy haze remains after cleaning, stop. That haze often signals etching, and it calls for a professional assessment rather than more scrubbing.
TL;DR:
Use mild cleaner first, then apply equal parts vinegar and water for 5 to 15 minutes; choose limescale remover only if labeled safe for glass.
After cleaning, inspect the glass in direct light; persistent cloudy patches suggest etching, so stop scrubbing and seek professional assessment before the damage worsens.
Avoid razor blades, metal scrapers, steel wool, and scouring pads; test cleaners on a hidden spot and keep solutions away from seals and frames.
Rinse and squeegee weekly or every other week, dry the glass instead of air drying, and rinse promptly after construction work or sandstorms to limit deposits.
Specializedcleaning
specializedcleaning.ae
Restore Clear Balcony Glass Safely
Specializedcleaning provides professional cleaning in Dubai, including deep cleaning for stubborn stains that resist careful home cleaning.
Safe Cleaning Materials and Tools for Balcony Glass
Mineral deposits respond well to gentle chemistry, not brute force. Manufacturer glass care guidance recommends mild, non-alkaline cleaners paired with grit-free, soft applicators to lift deposits without marking the surface.
Reach for these instead of a hardware-store scraper:
A mild, non-alkaline window cleaner or diluted white vinegar for routine mineral buildup.
A few drops of dish soap mixed into the vinegar solution for tougher spots.
Microfiber cloths, a soft sponge, and a squeegee for wiping and drying.
A spray bottle and bucket for mixing and applying solution evenly.
A commercial limescale remover, only after checking the label for glass safety.
A water-fed pole for balconies with hard-to-reach exterior panels.
Skip steel wool, metal scrapers, razor blades, green scouring pads, and any concentrated acid or strong alkali. These can scratch glass or strip protective coatings in seconds, and the damage is rarely reversible.
Pro Tip:Test any cleaner or tool on a small, hidden corner of the glass first, and keep all solutions away from seals and frames to avoid degrading them.
Step-by-Step Methods: From Mild to Stubborn Stains
Start gentle, then escalate only if the stain persists. Working through these three stages in order protects the glass and saves time.
Mild method first. Rinse the glass with clean water, apply a mild soap or window cleaner, wipe with a microfiber cloth, then squeegee and buff dry.
Vinegar and baking soda for moderate buildup. Mix equal parts white vinegar and water, spray generously, and let it sit for 5 to 15 minutes. For spots that resist the spray, work a baking soda paste into the area, then follow with a vinegar rinse to neutralize and lift the residue.
Commercial limescale remover for stubborn deposits. Choose a product labeled safe for glass, test it on a small area, follow the label’s dwell time, then rinse thoroughly and dry.
Vinegar-based cleaning methods work because acetic acid breaks down the calcium and magnesium bonds that cause hard water spots, without the harsh chemistry that can damage coated glass. Cleaning pros interviewed by Good Housekeeping suggest adding dish soap to the vinegar mix for tougher deposits and using a delicate eraser-type sponge cautiously, always finishing with a full rinse and dry to stop residue from redepositing.
Checking for etching: after a full cleaning pass, look at the glass in direct light. Removable mineral deposits wipe away to a clear, uniform surface. Etched glass keeps a dull, cloudy patch no matter how much you clean it, because the damage sits below the surface rather than on top of it. Professional glazing guidance warns that aggressive scraping on etched glass tends to make the clouding worse, not better.
Rinse and squeegee immediately after every cleaning session. Leftover moisture evaporates and leaves fresh mineral traces behind, undoing the work you just did. For most balconies, regular cleaning every few weeks keeps deposits from building into something harder to shift.
When Balcony Glass Needs a Professional Instead of DIY
A few signs mean it’s time to stop cleaning and call someone with the right training and equipment:
A milky or cloudy haze that stays after a full clean, suggesting etching rather than surface deposit.
Chalky white residue that keeps returning within days of cleaning.
Visible scratches from a previous DIY attempt with a scraper or abrasive pad.
Exterior panels on upper floors that aren’t safely reachable from inside the balcony.
Professionals typically start with de-scaling, then move to cerium-oxide polishing for light etching, and assess whether deep damage calls for restoration or glass replacement. High-rise exterior work usually relies on water-fed poles for mid-level access or rope access methods for taller buildings, which keeps technicians and the glass itself safe during the clean.
Pro Tip:Before hiring anyone, ask about licensing and insurance, experience with glass restoration specifically, their test-patch policy, and whether the quote is written and covers liability. Cost usually depends on how severe the staining is, how hard the glass is to reach, and whether a protective coating needs special handling.
Keeping Balcony Glass Clear Between Deep Cleans
Prevention costs far less effort than restoration. A rinse and squeegee once a week or every other week, depending on exposure, keeps mineral deposits from ever building into a visible stain.
Rinse balcony glass promptly after sandstorms or nearby construction work, since alkaline runoff from concrete and mortar can chemically bond to glass if left to dry.
Dry the glass fully after every rinse rather than letting water evaporate on its own.
Consider a water-repellent coating treatment compatible with your glass type, tested on a small area first.
Schedule a periodic professional facade or balustrade clean if your balcony faces heavy dust, wind, or runoff exposure.
Manufacturer maintenance recommendations point to the same conclusion: regular, quick rinsing is what prevents mineral deposits from chemically bonding into something that eventually needs restoration. Small habits, drying the glass and rinsing after exposure, do more long-term work than any single deep clean.
What Years of Glass Cleaning in Dubai Have Taught Us
Cleaning balcony glass requires trained staff and equipment suited to the job, from soft-tool detailing to facade-level access, always with surface protection in mind.
Early, consistent cleaning helps prevent chemical bonding that turns a quick wipe-down into a costly restoration job later.
— Qadir
How We Help When Stains Won’t Budge
When a balcony stain outlasts vinegar, baking soda, and a commercial cleaner, or when the glass sits somewhere you can’t safely reach, that’s where our deep cleaning services and facade cleaning capability take over. We handle stain removal and polishing on glass and balustrades, with access methods suited to the height and layout of your building.
Typical service includes a site assessment and test patch before committing to a method, scheduling and consultation to scope the work, staff trained in safety-first access and surface-safe techniques, and a written quote detailing scope and cost.
If your balcony glass has gone past what a weekend of scrubbing can fix, request a free consultation and we’ll assess whether it needs a deep clean, a polish, or a closer look for etching.
FAQ
How do you get hard stains out of glass?
Start with a mild, non-alkaline cleaner or a diluted white vinegar solution applied with a soft cloth, then rinse and squeegee dry. For stubborn spots, a baking soda paste followed by a vinegar rinse, or a glass-safe commercial limescale remover, usually clears mineral buildup that mild cleaning alone can’t touch.
What should you never use to clean glass?
Avoid steel wool, razor blades, metal scrapers, and green scouring pads, since these can permanently scratch glass. Strong alkalis and concentrated acids also risk damaging coatings, so stick to mild, non-alkaline products instead.
What’s the best way to clean glass patio doors?
Rinse the glass first to loosen loose dust, then wash with a mild soap or diluted vinegar solution using a microfiber cloth. Finish with a squeegee and dry buff to prevent new water spots from forming as the surface dries.
Does WD-40 clean glass?
WD-40 isn’t part of the manufacturer-recommended or professionally tested methods for balcony glass, and it isn’t formulated for mineral deposit removal. Stick to mild, non-alkaline cleaners or a vinegar-based solution, which dissolve calcium and magnesium deposits without risking coatings.
Why does balcony glass get hard water stains?
Hard water stains form when water containing calcium and magnesium evaporates and leaves mineral deposits behind on the glass surface. In exposed balcony settings, repeated rain, irrigation overspray, or construction runoff speeds up the buildup if the glass isn’t rinsed and dried regularly.
Most carpets in offices and commercial spaces dry in about 6 to 12 hours after professional shampooing under good indoor conditions, with the most effective step being immediate control of air movement and humidity. Thicker pile, wool fibers, or high indoor humidity can extend drying to 12 to 24 hours, while heavily saturated carpets from leaks or floods may require 24 to 72 hours or longer. Running your HVAC system or a dehumidifier and positioning fans for cross airflow right after cleaning is essential to speed up drying in commercial environments.
TL;DR:
Low moisture methods can leave carpet fully dry within 6 to 12 hours, while hot water extraction may take 6 to 24 hours.
The surface may be safe for walking before the backing and pad dry, but keep furniture off until every layer is fully dry.
Use two fans at opposite ends of the room, run air conditioning or a dehumidifier, and keep windows closed when outdoor air is humid.
Federal guidance recommends drying wet materials within 24 to 48 hours to reduce mold risk; persistent dampness or musty odors warrant professional assessment.
Ask cleaners how many dry passes they make and what residual moisture their equipment leaves, because the pile can feel dry while padding remains wet.
Specializedcleaning
Keep Carpet Care Thorough
Specializedcleaning provides professional cleaning for homes and businesses in Dubai, including solutions for complex cleaning challenges.
Typical Drying Times and What “Dry” Actually Means
Drying time depends heavily on the cleaning method and the carpet itself, so a single number rarely tells the whole story. Low-moisture methods leave carpet surface dry within 2 to 6 hours and fully dry within 6 to 12 hours, which is why encapsulation cleaning has become popular for offices and commercial spaces that need fast turnaround. Traditional hot-water extraction, still the most common professional method, typically dries in 6 to 12 hours under normal indoor conditions, though reports on the full range extend to 6 to 24 hours depending on humidity, airflow, and fiber type.
Wool, thick pile, and carpet in humid rooms often need 12 to 24 hours, and heavily wetted carpet from flooding can take 24 to 72 hours or more.
Surface dry means the fibers feel dry to the touch, but backing and padding can still hold moisture.
Fully dry means the pile, the backing, and the pad underneath have all released their moisture.
Carpet is generally safe to walk on once surface dry, but furniture should wait until it is fully dry to avoid trapping dampness or causing indentation marks.
Padding dries slower than the visible pile, so judging dryness by touch alone can be misleading.
What Determines How Fast Your Carpet Dries
Several variables interact to set your actual drying time, and understanding them helps you diagnose why one job dries in 6 hours while another takes a full day.
Cleaning method and extraction quality: hot-water extraction pulls out more moisture than shampooing but leaves more residual water than encapsulation or bonnet cleaning.
Fiber, pile height, and backing: dense wool carpet holds water longer than low-pile synthetic carpet, and thicker padding beneath it extends drying further.
Indoor humidity and temperature: a cooler, humid room slows evaporation, while warm, circulating air speeds it.
HVAC air changes and outdoor air quality: mechanical ventilation that exchanges indoor air faster helps, but pulling in humid outdoor air can work against you.
Technician technique: the number of dry passes made during extraction and the extractor’s suction settings directly affect how much water remains in the carpet.
A carpet cleaning standard from the Carpet and Rug Institute notes that most residential carpets dry within 6 to 12 hours after extraction when ventilation and HVAC circulation are used properly. That benchmark assumes the technician used an effective number of dry passes and the extractor removed most of the water during cleaning, not just on the surface.
Extraction performance is measurable. The industry’s residual moisture testing method documents how much water different extractors leave behind, which is why asking your cleaner about their equipment and dry-pass count matters more than trusting a surface touch test. Carpet can feel dry at the top while the pad underneath stays saturated for hours longer, especially with thicker underlayment.
How to Speed Up Carpet Drying: Step-by-Step
Cutting drying time comes down to moving air, pulling out humidity, and acting fast in the first few hours. Follow these steps in order:
Blot residual moisture immediately. Use clean white towels to press out surface water right after cleaning finishes, and ask your cleaner for one or two extra dry passes if the carpet feels heavily damp.
Set up fans for cross-flow airflow. Place two or more floor fans at opposite ends of the room, angled to push air across the carpet surface rather than straight down.
Run HVAC or a dehumidifier. Commercial cleaning guidance recommends air movers, HVAC systems, and dehumidifiers to meaningfully cut drying time, especially in humid climates where opening windows can backfire.
Keep windows closed if outside air is humid. Bringing in moist outdoor air slows evaporation more than it helps, so air conditioning or a standalone dehumidifier is usually the better call.
Rent equipment for larger jobs. A wet-vac, additional floor fans, or a dehumidifier rented for 24 hours can resolve a slow-drying room without waiting on indoor climate alone.
Protect furniture legs. Place plastic or foil tabs under furniture legs until the carpet is fully dry, which prevents color transfer and moisture trapping.
Monitor progress by touch, smell, and time. Check for a cool, damp feel or musty odor at the 12-hour and 24-hour marks, and verify the backing and pad feel dry before moving furniture back into place.
Pro Tip:Set your thermostat near 70°F and run two fans with your air conditioning rather than opening a window, since cooler, drier indoor air pulls moisture out of carpet fibers faster than humid outdoor air ever will.
Mold Risk: Why the First 24 to 48 Hours Matter
Standing moisture invites bacterial and mold growth fast, which is why timing matters beyond comfort. Federal guidance on water damage states that drying wet materials within 24 to 48 hours significantly reduces the risk of mold growth. That window applies to carpet just as it does to drywall or furniture.
Watch for these warning signs:
A musty odor that develops or lingers past 24 hours.
Visible mold spots on the carpet surface or along baseboards.
Carpet that still feels damp or cool to the touch after 24 hours.
Standing water or saturated padding from a leak or flood rather than routine cleaning.
When these signs appear, remediation typically involves re-extracting the moisture, pulling back the carpet and pad to dry them separately with air movers and dehumidifiers, and discarding padding that cannot dry fully within that window.
When to Call a Professional and What to Ask
A carpet that stays damp past 12 to 24 hours after routine cleaning, or one that has been soaked by a leak, flood, or burst pipe, is past the point where fans and patience alone will fix it. Soaked padding, a musty smell, or any sign of standing water calls for a professional assessment rather than more waiting.
When you call, ask these questions:
What extraction method will you use, and how many dry passes does the job include?
What residual moisture level should I expect right after the job, based on your equipment?
Will you bring air movers or a dehumidifier, or should I arrange those separately?
What is your plan if the padding or backing stays wet after extraction?
Do you provide a written dry-time estimate, and is a follow-up visit included if the carpet lags behind?
A cleaner who references hot-water extraction procedure and gives a specific dry-time estimate, rather than a vague “it’ll dry overnight,” is giving you something to hold them to.
A Local Perspective on Faster, Safer Drying
Experience shows that jobs that pair thorough extraction with immediate HVAC and air mover coordination dry faster and more evenly than jobs left to air dry alone. Licensed technicians and timely scheduling are important because drying starts the moment cleaning ends, not hours later. Ask about dry-pass details when you book, every time.
Our Take: Stop Trusting the Surface Touch Test
The most common mistake we see is treating a dry-feeling carpet surface as proof the job is done. It isn’t. Padding and backing routinely stay damp for hours after the pile feels fine, and that gap is exactly where musty odors and mold risk start to build. Conventional advice leans too heavily on “just wait it out” or “open a window,” and in a climate where outdoor humidity often works against you, that guidance can actively slow drying rather than speed it.
What actually moves the needle is airflow and humidity control applied immediately, not eventually, paired with a cleaner who tells you upfront how many dry passes they performed and what residual moisture to expect. Readers who prioritize one thing from this article should prioritize that conversation before the job even starts, not troubleshooting after the carpet still feels damp the next day.
— Qadir
How We Handle Cleaning and Managed Drying Together
Drying is treated as part of the cleaning job, not an afterthought left to HVAC systems alone. Carpet shampooing services pair thorough extraction with coordinated air movers and dehumidifiers, and timely scheduling helps us respond quickly when a spill or leak turns into a time-sensitive drying problem rather than routine maintenance.
When you book, ask us directly about our extraction method, expected dry-pass count, and a realistic dry-time estimate for your specific carpet and room conditions. You can review our carpet shampooing services and request a free consultation to get a drying plan built around your space before we ever start.
FAQ
How long does it take for carpet to dry?
Most carpets dry within 6 to 12 hours after professional cleaning under normal indoor conditions. Thicker pile, wool fibers, or high humidity can extend that to 12 to 24 hours, and heavily saturated carpet from flooding may take 24 to 72 hours or longer.
How can I speed up carpet drying?
Run your HVAC system or a dehumidifier and position fans for cross-flow airflow across the carpet surface immediately after cleaning. Keep windows closed if outdoor humidity is high, since mechanical ventilation and dehumidification are usually more effective than fresh air in humid climates.
Does carpet dry faster in heat or cold?
Warm, circulating air generally speeds evaporation more than cold air, though extreme heat without airflow offers little benefit on its own. A moderate indoor temperature paired with fans and air conditioning works better than relying on heat alone.
Why is my carpet still damp after 24 hours?
Carpet that stays damp past 24 hours often has moisture trapped in the backing or padding rather than the visible pile, which a surface touch test won’t reveal. Insufficient dry passes during extraction, high indoor humidity, or thick padding are common causes, and federal guidance recommends addressing wet materials within 24 to 48 hours to limit mold risk.
Identify the haze type first, then reach for the gentlest method that works: dry buffing for fresh cement haze, a buffered acid after the grout has fully cured on acid-safe tiles, or an alkaline or epoxy-specific remover for polymer and epoxy residue. Skipping the diagnosis step is how homeowners etch stone or ruin a few days of careful tile work. Respecting the grout’s cure time matters just as much as picking the right product.
TL;DR:
Use a water drop test: quick absorption suggests cement haze or efflorescence, while beading points to polymer, epoxy, or sealer residue.
Buff fresh cement haze with a dry microfiber cloth the same day; after grout fully cures, use buffered acid only on acid safe tile.
For glossy residue that beads water, choose an alkaline cleaner for polymer haze or an epoxy specific remover; repeat treatment rather than strengthening chemicals.
Never use acid on marble, limestone, or travertine; use a pH neutral stone safe cleaner, and stop if fizzing, dulling, or etching appears.
Call a professional after two or three failed treatments, for extensive cured epoxy residue, or whenever natural stone is already etched.
Specializedcleaning
Get Help With Stubborn Grout Haze
Specializedcleaning provides professional cleaning services in Dubai, including solutions for complex cleaning challenges in residential and commercial spaces.
Before opening any bottle, figure out what you are actually looking at. Cement haze usually looks dull and powdery and sits on the tile surface in a thin film. Polymer or ready-mix haze tends to look slicker and almost glossy, and it often beads water rather than absorbing it. Epoxy haze feels harder and more plastic-like, sealer residue looks streaky and uneven, and efflorescence shows up as a white, crystalline bloom that can return after cleaning if the moisture source isn’t addressed.
A simple water-drop test helps confirm which you’re dealing with:
If water absorbs quickly, you’re likely looking at cement-based haze or efflorescence.
If water beads up and sits on the surface, that points to polymer, epoxy, or sealer residue.
If nothing happens at all, the surface may already be sealed or coated.
Before reaching for any chemical, check the grout manufacturer’s Technical Data Sheet. Industry guidance commonly recommends waiting the full cure period, often 7 to 14 days for cement grout, before applying any acidic cleaner.
Step-by-step method for cementitious grout haze
Cement haze responds well to a graduated approach, starting with the least aggressive option.
On the same day the haze appears, buff it with a dry microfiber cloth. Fresh film hasn’t bonded yet, and friction alone often lifts it.
If dry buffing doesn’t finish the job, dampen a white nylon pad with water and scrub in small circles, rinsing the pad often.
For haze that has cured and hardened, wait out the grout’s cure window, then use a buffered acidic grout haze remover on tile that’s confirmed acid-resistant.
Pre-wet the tile, dilute the product exactly per the label, apply for the shortest recommended dwell time, and agitate with the nylon pad.
Wet-vac or sponge up the resulting slurry before it dries, then rinse the area at least twice and neutralize if the product instructions call for it.
Never substitute muriatic acid for a buffered product. It’s harsher, less predictable, and more likely to damage grout joints. Always test in a hidden corner first.
Pro Tip:Keep a damp sponge within reach during acid treatment so you can catch and rinse slurry before it has a chance to dry and redeposit as a new haze layer.
How to remove polymer or ready-mix grout haze
Polymer and latex-modified grout residue behaves differently from cement haze, and acid often fails against it or makes the film worse by hardening it further. The diagnostic workflow from Grout Atlas recommends switching to alkaline or manufacturer-specified cleaners once you recognize this slicker, glossier film.
Confirm the film is polymer-based: it looks glossy and causes water to bead rather than soak in.
Apply an alkaline or manufacturer-recommended cleaner with a white scrub pad rather than an acidic one.
Test a small section first, follow the label’s dwell time exactly, then agitate and rinse.
Repeat the treatment once or twice if residue remains rather than increasing chemical strength.
If two or three attempts leave haze behind, stop and call a professional before the surface gets scratched from excess scrubbing.
Partner guidance on tile and grout cleaning methods echoes this sequence: extraction and mechanical agitation first, stronger chemistry only when needed.
Removing epoxy grout haze: timing and special techniques
Epoxy resists both acid and plain water because it cures into a hard, plastic-like film rather than a mineral one, which is why epoxy-specific removers are the only reliable option. Industrial-grade epoxy can cure in as little as 4 days, while residential epoxy often takes 7 to 14 days to fully set, and haze is far easier to remove before that window closes.
Treat haze as early as the manufacturer allows rather than waiting for full cure.
For heavy residue, apply the remover and cover the area with plastic sheeting to extend dwell time without evaporation.
Expect to repeat treatment on stubborn patches rather than increasing dwell time indefinitely.
Once epoxy fully hardens, mechanical assistance alongside the chemical treatment is often necessary.
What to do on marble, limestone, and other acid-sensitive tiles
Calcite-based stone, including marble, limestone, and travertine, reacts to acid almost immediately. A visible fizzing or bubbling, sometimes called a sizzle reaction, is the clearest warning sign to stop before the surface etches permanently.
Skip acidic haze removers entirely on calcite-based stone, even buffered ones.
Choose pH-neutral, stone-safe cleaners paired with gentle hand or pad agitation instead.
Always test a hidden patch and watch for fizzing before treating the full surface.
If etching has already happened, professional polishing is usually the only fix.
Pro Tip:Keep a small vial of white vinegar nearby during the test patch, a drop that fizzes on stone tells you to stop immediately, before it tells you on the whole floor.
Our guide on removing stains from marble walks through stone-safe cleaning in more depth if you’re working with a sensitive surface.
Checklist of tools and products for safe DIY haze removal
Gathering the right supplies before you start prevents half the common mistakes homeowners make mid-job.
Microfiber cloths and white nylon scrub pads for mechanical cleaning without scratching.
A plastic scraper, wet-vac or squeegee, bucket, and mop for slurry removal and rinsing.
A buffered acidic remover for cement haze on acid-safe tile, an alkaline cleaner for polymer residue, an epoxy-specific remover for epoxy haze, and a pH-neutral cleaner for stone.
Gloves, eye protection, and a quick read of each product’s safety data sheet before mixing or applying anything.
Preventing haze during installation and proper aftercare
Most haze is easier to prevent than to remove later, and the steps that stop it also protect your grout long-term.
Pre-wet tile surfaces before grouting so the grout doesn’t bond as tightly to the tile face.
Buff fresh haze off the same day it appears, before it has a chance to cure.
Avoid grouting in dry, dusty conditions that accelerate surface film formation.
After cleaning, rinse the area at least twice and let grout dry 24 to 72 hours before sealing.
Choose a sealer suited to your grout type and keep up with routine mopping to prevent haze from reappearing.
Signs you should stop and call a professional
Some situations call for professional equipment and chemistry rather than another round of DIY attempts.
Natural stone that’s already shown signs of etching or dulling.
Extensive, fully cured epoxy haze covering large areas.
Large commercial or post-construction floors where manual scrubbing isn’t practical.
Repeated DIY attempts that haven’t resolved the haze after two or three tries.
Professionals bring correct chemistry matched to your tile and grout, low-RPM buffing machines, wet-vac extraction, and safe disposal of spent chemicals. Our licensed team has extensive experience handling tile and grout restoration across Dubai, having encountered nearly every haze scenario a homeowner can run into, from stubborn epoxy film to etched marble that needs re-polishing.
A practical closing note on grout haze
The biggest mistake we see is reaching for the strongest acid in the cabinet before confirming what the tile and grout can actually handle. Test small, work gently upward in strength, and call in help the moment a stone surface starts to react.
— Qadir
Get professional help with persistent tile and grout haze
When DIY methods have run their course or the surface is simply too risky to experiment on, our grout cleaning team steps in with the correct chemistry for your tile type, extraction equipment, and the experience to avoid etching or redepositing residue.
We also handle floor restoration and polishing for stone that’s already etched, and post-construction deep cleaning for new installations covered in haze and debris. Reach out to inquire about consultation and scheduling options to get your tile looking the way it should.
FAQ
How to remove heavy grout haze from tile?
Start with dry buffing and mechanical scrubbing using a white nylon pad, then move to a buffered acidic remover for cement haze on acid-safe tile, or an epoxy-specific remover for epoxy film. Always confirm the grout’s cure period and test a small area before treating the full surface.
Will grout haze eventually go away?
Light cement haze sometimes fades with normal foot traffic and cleaning, but polymer and epoxy haze generally won’t disappear on their own and need the correct remover. Waiting without treating cured epoxy or polymer film usually makes it harder to remove later.
Does vinegar get rid of grout haze?
Diluted vinegar can lift very light cement haze on glazed ceramic and porcelain, but it’s still an acid that can etch stone and weaken grout that hasn’t fully cured. Purpose-made haze removers give more predictable, safer results on most surfaces.
What is the strongest grout haze remover?
There isn’t one universal “strongest” product, since cement, polymer, and epoxy haze each need a different chemistry matched to your tile’s acid sensitivity. A buffered acidic remover works well for cured cement haze on acid-safe tile, while epoxy haze requires an epoxy-specific remover instead.
Sanitization lowers germ counts to a level public health standards consider safe for everyday contact, while disinfection uses chemical agents to kill a broader range of bacteria and viruses on a surface. Disinfection is the stronger process and the one you reach for in higher-risk situations. Either way, the surface needs a real cleaning first, because dirt and grime block both processes from working.
TL;DR:
Sanitation lowers germ levels to safe standards, while disinfection uses chemicals to eliminate a broader range of pathogens on surfaces.
Proper cleaning with soap or detergent is essential before applying any sanitizing or disinfecting product, as dirt blocks chemical effectiveness.
Disinfectants like bleach, alcohol, and quats vary in strength, surface compatibility, and contact time requirements, influencing their appropriate use cases.
Higher-risk situations such as illnesses, bodily spills, or clinical environments require disinfecting rather than sanitizing for effective pathogen removal.
Always follow label instructions precisely, including contact time and safety precautions, to ensure disinfectants work effectively and safely.
Specializedcleaning
Keep Your Space Hygienic
Specializedcleaning provides professional cleaning solutions for residential and commercial spaces, including complex hygiene challenges in Dubai.
Cleaning, Sanitizing, Disinfecting, and Sterilizing: What Sets Them Apart
These four words get used almost interchangeably in everyday conversation, but each one describes a distinct level of germ control.
Cleaning removes dirt, dust, and organic matter with soap or detergent and water. It physically lifts debris away but does not necessarily kill pathogens.
Sanitizing reduces bacteria to a level public health standards consider safe, often through cleaning alone or with a mild chemical sanitizer.
Disinfecting uses chemical agents that are tested and registered to kill a wider range of viruses and bacteria, according to the EPA’s distinctions between product categories.
Sterilizing eliminates all forms of microbial life, including spores, and is typically reserved for medical and lab settings.
A kitchen counter usually needs cleaning and occasional sanitizing. A restaurant dish rack needs sanitizing after every wash cycle. A surgical instrument needs full sterilization before it touches a patient. Matching the right level to the right setting is the whole game, and it starts with knowing which word actually applies to the job in front of you.
When Should You Sanitize Instead of Disinfect?
Choosing between the two comes down to risk level, not personal preference.
Routine, low-risk situations call for cleaning or sanitizing: kitchen counters, children’s toys, general floors, and other everyday surfaces where the goal is keeping germ counts low, not eliminating every pathogen.
Higher-risk situations call for disinfecting: when someone in the space is sick, after a bodily fluid spill, in clinical or healthcare-adjacent settings, or around equipment where contamination carries real consequences.
High-touch surfaces need extra attention: door handles, light switches, shared keyboards, and faucet handles pick up germs faster than most surfaces and benefit from more frequent attention regardless of which process you choose.
A good rule of thumb: sanitize for maintenance, disinfect for incidents. If you are reaching for a product because something specific happened (illness, a spill, a known exposure), that is your signal to disinfect rather than simply sanitize.
A Step-by-Step Routine for Cleaning, Then Sanitizing or Disinfecting
Getting this right is less about which product you buy and more about following the sequence correctly.
Begin by eliminating all visible dirt. Use detergent and water to clean away grease, grime, and debris, following the guidelines provided by the Dubai Municipality on cleaning and disinfection. This crucial first step ensures disinfectants can work effectively, as organic material can prevent chemicals from reaching microorganisms.
Select a disinfectant specifically formulated for the pathogens you need to target. Carefully check the product label to verify that the disinfectant is suitable for the germs or viruses present in your environment.
Prepare the disinfectant solution precisely according to the instructions. For routine disinfection outside healthcare environments, the Dubai Municipality advises using a freshly made 0.1% sodium hypochlorite solution (equivalent to one part 5% bleach to 49 parts water).
Ensure the surface remains visibly wet for the entire recommended contact time. Many users prematurely wipe or allow surfaces to dry, which reduces disinfectant effectiveness; reapplication may be needed if the surface dries too soon.
After use, ventilate the area thoroughly and store all chemicals securely. Keep containers tightly closed, away from heat and sunlight, and maintain good airflow by opening windows or using fans.
Pro Tip:Set a timer for the contact time listed on the label instead of guessing. Most people underestimate how long a surface needs to stay wet.
Bleach, Alcohol, and Quats: Strengths and Tradeoffs
Bleach (sodium hypochlorite) offers broad-spectrum killing power at a low cost but can corrode metal, bleach fabric, and discolor finishes, so it works best on hard, non-porous surfaces that can tolerate it.
Alcohol (around 70%) acts quickly on small, non-porous areas like doorknobs or phone screens, but it evaporates fast, which can cut the contact time short before the product finishes working.
Quaternary ammonium compounds (quats) are more stable and less corrosive than bleach, making them common in offices and upholstered spaces, though they have a narrower range of activity and can be inactivated by residue from certain soaps or hard water.
Even the strongest disinfectant only works within its tested conditions, which is why the EPA’s registered product guidance ties every disinfectant claim to specific label directions rather than general assumptions. Checking the label against your surface and target organism matters more than brand loyalty.
Reading the Label: Safety Rules That Actually Matter
Misusing disinfectants creates real hazards, from chemical burns to toxic fumes, so a few habits make a measurable difference.
Never mix chemicals, especially bleach and ammonia-based cleaners, which produce dangerous gas when combined.
Ventilate the space by opening windows or running exhaust fans while using any chemical disinfectant.
Wear gloves and eye protection when the label recommends it, particularly with concentrated solutions.
Follow the label’s contact time, target organisms, and surface compatibility notes rather than assuming one product works everywhere.
Avoid large-scale spraying or fogging in public spaces, a practice WHO specifically advises against, and never spray disinfectant directly on people.
How Professionals Handle the Harder Jobs
The clean-then-disinfect sequence gets more demanding once the surfaces are complex systems rather than countertops. HVAC ductwork, data center equipment, and water tanks each carry their own material-compatibility and airflow considerations that make guesswork risky. Our teams handle HVAC duct cleaning and data center cleaning with dilution protocols and contact-time controls matched to sensitive equipment, and we apply the same discipline to water tank cleaning and disinfection. With over 15 years in the field and licensed staff, we know when a job has moved past what a bottle of spray and a paper towel can safely handle, and post-construction sites fall into that category too, which is why deep cleaning services exist as a separate category of work.
Our Take on Chasing a Germ-Free Space
Nobody’s home or office is ever truly sterile, and chasing that standard in daily life wastes time and money. The realistic goal is risk reduction: clean consistently, sanitize the everyday surfaces, and reserve disinfection for the moments that actually call for it. Professional help earns its cost once the system gets complex or the stakes get high. Commit to cleaning first and reading the label every time, and you are already ahead of most routines we see.
— Qadir
FAQ
What is the difference between sterilization, disinfection, and sanitization?
Sterilization eliminates all microbial life including spores, disinfection kills a broad range of bacteria and viruses on surfaces, and sanitization lowers germ counts to a level considered safe by public health standards. Sterilization is reserved for medical and lab equipment, while the other two apply to everyday surfaces.
What is the difference between disinfection and sterilization?
Disinfection kills most harmful bacteria and viruses but does not necessarily destroy every microorganism, including resistant spores. Sterilization is a more intense process that eliminates all microbial life, which is why it is required for surgical instruments rather than countertops.
Do you disinfect or sanitize first?
Neither comes first: cleaning always comes before either one, because dirt and organic residue block chemicals from reaching germs effectively. Once a surface is visibly clean, you choose sanitizing for routine upkeep or disinfecting for higher-risk situations, never the chemical step before the clean.
What is the difference between sanitizing and sterilizing?
Sanitizing reduces germ counts to a safe level for everyday settings like kitchens and dish racks, while sterilizing removes all microbial life entirely, including spores. Sterilizing is a far more rigorous process, typically requiring heat or specialized equipment found in medical and lab environments.
If your vinyl floor has built-up finish, scuffing, or a dull haze, the fastest reliable fix is a diluted chemical stripper paired with a low-speed machine scrub. For factory-finish LVT or LVP, skip stripping altogether: routine cleaning or a light top-scrub handles it. We walk through both paths below, including when the job calls for a professional crew instead of a weekend project.
TL;DR:
Vinyl floors with heavy wax buildup, flaking finish, or deep scuffing require chemical stripping and low-speed scrubbing, while factory-finish floors rarely need it.
Proper stripping involves applying a diluted stripper, keeping it wet during scrubbing, rinsing multiple times, and confirming pH neutrality before recoating.
Recent installations or floors with damaged adhesive or loose tiles should be repaired or removed before considering finish stripping.
Skipping rinsing or using aggressive, no-rinse stripper formulas on new floors risks damaging adhesives or subfloor integrity.
Professional restoration is recommended for large areas, old adhesive residues, or when extensive damage requires specialized equipment and waste management.
Specializedcleaning
specializedcleaning.ae
Restore Your Vinyl Floors Safely
Specializedcleaning combines experienced professionals and specialized equipment for complex floor cleaning challenges in Dubai homes and businesses.
Not every dull or scuffed vinyl floor needs stripping. Check for these signs first, because stripping the wrong floor type wastes time and can damage the surface.
Wax or finish buildup: a yellowish, sticky film or uneven sheen across the floor signals old finish layers that need removing.
Scuffing and traffic wear: dark scuff marks that won’t lift with regular mopping usually mean the topical finish is worn through.
Flaking or peeling finish: patches where the coating lifts at the edges call for a full strip rather than a spot fix.
Factory-finish LVT/LVP: many luxury vinyl products carry a factory-applied UV-cured urethane finish that doesn’t require an additional floor finish, so stripping or waxing it can create more maintenance problems than it solves.
New installations: floors installed recently need a cure window before any wet stripping, which we cover later.
To identify your vinyl type, check the manufacturer’s installation paperwork or test a small, hidden area with a neutral cleaner. If a light scrub restores shine without chemical stripper, you’re likely dealing with a factory finish that never needed stripping in the first place.
How do you strip and recoat a vinyl floor finish?
Stripping is a wet, multi-step process, and skipping steps is the most common reason floors end up hazy, slippery, or damaged. Follow this sequence for vinyl composition tile (VCT) or sheet vinyl with a site-applied finish.
Prep the space. Clear furniture, post wet-floor signage, open windows or run fans for ventilation, and test your stripper on a hidden corner first.
Mix the stripper. Dilute according to buildup level. Manufacturer guidance for VCT and resilient floors recommends adjusting stripping solution strength to the amount of finish buildup, using a stronger mix for heavy wax layers and a lighter mix for routine maintenance.
Apply and keep wet. Spread the solution evenly and keep it wet while scrubbing. Letting it dry on the floor lets dissolved finish re-bond to the surface.
Scrub with a low-speed machine. Use a rotary machine or auto-scrubber at roughly 175 to 350 rpm, matching whatever the manufacturer’s maintenance instructions specify. Pair it with the right pad: a red pad for light scrubbing, a blue pad for deeper buildup, since high-speed pads or aggressive abrasives can damage the vinyl surface.
Wet-vacuum the slurry. Pick up the dissolved finish immediately so it doesn’t dry back onto the tile.
Rinse multiple times. Run at least two to three clean-water rinse passes. Incomplete rinsing leaves alkaline residue that causes new finish to fail or haze over.
Check for neutrality. A quick pH check on the rinse water confirms no stripper residue remains before you recoat.
Dispose of slurry responsibly. Stripper slurry contains dissolved finish and chemical residue, so follow local wastewater disposal rules rather than pouring it down a storm drain.
Most commercial floor strippers, including 3M’s floor stripper concentrate, call for a 5 to 10 minute dwell time before scrubbing begins, and that window matters: pulling the machine too early leaves finish behind, while letting it sit too long on certain vinyl types risks surface damage.
Pro Tip:Work in small sections, manageable in size at a time, so the stripper never dries out before you scrub and rinse it.
Avoid aggressive, no-rinse strippers on any recently installed floors. These formulations can compromise adhesive bonds on newer VCT, leading to lifted or curling tiles that are far more expensive to fix than the original finish problem.
When finish stripping isn’t enough: tiles and adhesive
Sometimes the problem isn’t the finish at all. Loose tiles, hardened adhesive ridges, or visible substrate damage mean you’ve moved past stripping into removal territory.
Loose or lifting tiles: tap each tile with a knuckle; a hollow sound means the adhesive has failed and stripping won’t fix it.
Hardened adhesive residue: old adhesive left after tile removal often needs manual scraping or a heat gun to soften it before lifting.
Solvent-based adhesive removers: these work but require careful ventilation and should never be combined with aggressive strippers on the same pass.
Structural or subfloor damage: cracked, uneven, or moisture-damaged substrate is a stop sign. Pause and bring in a flooring professional before continuing, since grinding or improper removal can make subfloor problems worse.
Manufacturer timing rules and recoating guidance
Manufacturer instructions exist for a reason, and ignoring them is the fastest way to void a warranty or ruin a new installation.
Factory-finish LVT/LVP generally doesn’t need a site-applied finish at all, and applying wax on top can cause yellowing or a hazy film that’s hard to remove later.
Avoid wet-washing or stripping within the first five days after installation to let adhesive set properly.
On floors younger than two years, stick to milder stripping solutions rather than aggressive, no-rinse formulas that risk loosening the bond underneath.
After stripping, rinse thoroughly and confirm pH neutrality before recoating. Incomplete rinsing is the single most common cause of new finish failing to bond properly, according to Flexco’s LVT maintenance guidance.
If you do apply a site finish, plan on 3 to 5 thin coats, letting each dry fully, rather than one thick layer that dries unevenly or stays tacky.
Professional reality check: when to call in a restoration team
DIY stripping works well for a small kitchen or a single apartment unit. It stops working well once the job involves heavy buildup across a large footprint, old adhesive from a prior tenant, a tight turnaround between tenants, or a commercial fit-out where MEP systems need isolating before any wet work starts.
Scale and downtime: a property manager handling multiple units can’t always afford the drying and cure windows that careful DIY stripping demands.
Graded pad strategy: professional crews match pad grade and machine speed to each specific floor section rather than using one setting throughout.
Multi-pass rinse verification: trained teams check pH and visually inspect rinse water before moving to recoating, catching residue issues a homeowner might miss.
Waste handling: slurry disposal and site cleanup follow a documented process rather than guesswork.
Our team at Specialized Cleaning brings licensed staff and same-day consultations to floor restoration jobs that have outgrown a weekend DIY project.
Pro Tip:If a quote doesn’t separate stripping, adhesive remediation, and disposal into line items, ask for a revised breakdown before signing.
Practical habits that cut down repeat stripping
A little daily discipline stretches the life of any vinyl finish and means fewer full strip-and-recoat cycles over time.
Use neutral pH cleaners for routine mopping, never abrasive household detergents that dull the finish over time.
Put walk-off mats at every entrance to cut down on grit that scratches the surface.
Match your maintenance schedule to traffic: high-traffic commercial floors may need a top-scrub-and-recoat every few months, while a quiet bedroom floor can go much longer.
Request itemized quotes from any contractor, and treat a single lump-sum price with no breakdown as a red flag.
How we can help: professional stripping, restoration, and polishing
When a vinyl floor needs more than a weekend of elbow grease, our floor restoration team handles inspection, safe stripping, adhesive remediation, and final polishing as one job, not a guessing game split across separate contractors.
We offer free consultations and same-day scheduling for homes and businesses that need a straight answer on scope and timing. To get a quote, have your floor type, approximate square footage, a few photos of the problem areas, and any known issues like loose tiles ready. Reach out through our Floors Restoration & Polishing page, and our team will walk you through next steps.
FAQ
What is the best way to strip vinyl floors?
The most reliable approach combines a manufacturer-recommended chemical stripper with a low-speed floor machine, keeping the solution wet while scrubbing and following with a wet vacuum and multiple clean-water rinses. Skipping the rinse step is the most common cause of a failed recoat.
How much does it cost to strip and seal vinyl floors?
Pricing depends on floor type, area, and whether adhesive or tile damage is involved, so costs vary too widely to quote a single figure here. For an accurate number, request an itemized quote that separates stripping, rinsing, and recoating from any adhesive or substrate repair work.
Can vinyl floors be refinished?
Yes, vinyl composition tile and sheet vinyl with a worn site-applied finish can be stripped and recoated successfully using the manufacturer’s dilution and rinse instructions. Factory-finish LVT or LVP generally doesn’t need refinishing at all since the factory coating is designed to last without a topical layer.
Do vinyl floors need to be waxed?
Most modern LVT and LVP floors carry a factory-applied urethane finish that doesn’t require wax or an additional sealer, and adding wax can actually cause yellowing or haze. Older VCT or sheet vinyl without a factory finish may still benefit from periodic waxing and stripping as part of routine maintenance.
A professional deep-cleaning checklist is the contractor’s scope of work: it spells out the exact tasks, equipment, disinfectants, and acceptance criteria a provider agrees to deliver. The strongest checklists cover high-touch disinfection, floor and carpet deep work, grout and stone care, kitchen exhaust and HVAC options, and supporting documents like insurance and safety data sheets. Before signing anything, ask for that scope in writing, along with proof of licensing.
TL;DR:
Deep-cleaning scope should include high-touch disinfection with proper dwell times, surface-specific floor protocols, and dedicated tools for each zone, with documentation like SDS and insurance.
The checklist must be detailed room-by-room, covering entry points, offices, kitchens, restrooms, floors, and mechanical areas, with photo proof recommended for larger sites.
Specialty services such as floor polishing, grout restoration, facade cleaning, and ductwork are typically quoted separately due to equipment, time, and permit requirements.
Contractors must provide proof of licensing, insurance, and approved disinfectants before work, with clear acceptance criteria and regular review schedules.
On the day of cleaning, staff follow a predictable sequence, maintain safety protocols, and conduct a final walkthrough to ensure scope completion, with proper drying and ventilation.
Specializedcleaning
Get Your Deep Cleaning Scope Right
Specializedcleaning provides professional deep cleaning in Dubai for residential and commercial spaces, supported by experienced staff and specialized equipment.
1. What a professional deep-cleaning checklist should include
A deep clean is not a longer version of routine cleaning. It is a defined set of tasks with its own products, timing, and sign-off criteria, and a contractor’s written scope should show all of it. The Green Seal Cleaning Services Guidebook recommends separating routine, periodic, interim, and restorative work in the schedule itself, so a client can see exactly what “deep clean” covers versus what gets billed separately.
A complete contractor checklist generally includes:
High-touch disinfection of door handles, switches, railings, and shared equipment, applied with the correct dwell time for each product.
Floor protocols matched to surface type: vacuuming and extraction for carpet, wet mopping or steam for hard floors, with polishing treated as a separate restorative service.
Restroom and kitchen deep cleaning done in sequence, using dedicated tools for each zone rather than shared mops and cloths.
Carpet and upholstery cleaning with a stated drying window, since trapped moisture undermines the whole job.
Supporting paperwork: safety data sheets (SDS) for every disinfectant, an equipment list, proof of insurance, and staff identification.
The Green Seal guide also recommends uploading an SDS for every registered disinfectant used on an account, which gives building managers a paper trail if anyone raises an allergy or compliance question later. We treat that documentation requirement as a baseline, not an upsell, when we put together a deep cleaning services scope for a home or office.
2. A room-by-room checklist you can hand to any contractor
A written scope is only useful if it tells you what happens in each part of the property. Walking through the space area by area, before work starts, gives both sides a shared reference point and something concrete to check against at handover.
Entrance and reception: mats shaken or extracted, glass doors and partitions cleaned streak-free, touchpoints disinfected, and floors treated according to their material.
Offices and meeting rooms: dusting done high to low (ceiling vents and light fixtures before desks and skirting), with electronics wiped using equipment-safe products rather than general-purpose sprays.
Kitchens and pantries: hoods and exhaust surfaces degreased, countertops and backsplashes sanitized, and appliances pulled out or opened to clean behind and underneath them.
Restrooms: high-touch surfaces disinfected, drain traps cleared, moisture controlled to limit mold growth, and tools kept exclusive to that zone to avoid cross-contamination.
Floors and carpets: method matched to surface (extraction, steam, dry buffing) with a stated drying time before the area returns to normal use.
Mechanical and service areas: duct access points identified for HVAC work, and water tank cleaning scheduled with the correct safety steps and permits, since this touches the building’s water supply.
A partner resource on move-in cleaning checklists echoes this room-by-room structure and adds a useful habit: photo documentation of each area before and after, which gives both parties proof of what was actually done. For larger or mixed-use sites, a building cleaning checklist for high-rises shows how the same logic scales to multiple floors and shared common areas.
3. Specialty services and exclusions you should expect to see quoted separately
Not every item in a cleaning conversation belongs inside a standard deep-clean quote. Some tasks require different equipment, more time, or specific permits, which is why reputable contractors price them on their own line rather than folding them into a flat deep-clean rate.
Items usually quoted separately include:
Floor polishing and restoration, including marble, vinyl, and wood, which need curing time and specialized machines.
Grout and tile restoration, since discoloration often requires mechanical abrasion rather than standard cleaning.
Facade and high-rise exterior cleaning, which involves access equipment and safety permits.
Data center cleaning, where static-safe tools and strict airflow controls are non-negotiable.
HVAC duct deep work, covered in our guide to HVAC duct cleaning, which requires duct access and containment to avoid spreading debris.
Most contracts also exclude stain guarantees on pre-existing damage and the handling of hazardous materials outside a technician’s training. If a quote looks unusually low, check what it has left out before assuming it is unusually good value.
Pro Tip:Ask for floor restoration and duct cleaning to be itemized on separate lines, even if you plan to book them together, so you know exactly what each service costs and covers.
If your project follows construction work, the line between a standard deep clean and post-construction cleaning matters even more, since dust and debris loads are far heavier.
4. How contractors tailor scope, and what to confirm before you sign
A good scope is never generic. It should reflect your specific building, its traffic patterns, and any special-use areas like server rooms or commercial kitchens. The BSCAI Cleaning & Disinfecting SOW Guide stresses planning for vulnerable occupants and documenting the schedule and procedures clearly, rather than relying on a verbal agreement.
Before you sign a contract, confirm:
A building-specific scope that separates routine, periodic, and restorative tasks, with a stated frequency for each.
Proof of Dubai Municipality (DM) external approval and a valid trade license, plus public liability insurance.
Staffing details including language, training, PPE provisions, and equipment maintenance schedules.
Clear acceptance criteria: a sign-off checklist, photo proof of completed work, a rework policy, and payment milestones tied to delivery.
Both Green Seal and BSCAI recommend reviewing cleaning schedules at least twice a year to account for seasonal changes, occupancy shifts, or special events, according to the Green Seal guidebook. A contractor who builds that review into the contract from the start is telling you something useful about how they operate.
KPM Global also flags the warning signs worth watching for: no DM approval on file, unapproved chemicals in use, or no public liability insurance. Any one of these should pause the conversation until the contractor clears it up.
5. What to expect on the day of the deep clean
Knowing the sequence in advance keeps the day predictable for everyone, from staff check-in to the final walkthrough.
Arrival and setup: staff check in with ID, insurance documents are available on request, and equipment is staged by zone before work begins.
Work sequence: homes typically run top-to-bottom and back-to-front in a single pass, while offices and warehouses often work zone by zone to keep part of the space usable.
Safety during disinfection: cordons go up around wet or treated areas, occupants are asked to stay clear while dwell times run, and staff wear the PPE appropriate to the chemicals in use.
Aftercare and sign-off: floors and carpets get a stated drying window, spaces are ventilated before reoccupation, and a final checklist walkthrough confirms the work against the agreed scope, with a short rework window if something was missed.
6. What experience teaches about getting the checklist right
After years of running deep cleans across homes, offices, and specialized facilities, we have learned that the checklist matters less than how consistently it gets followed. Indoor air quality, equipment integrity, and the correct chemical for the surface in front of us take priority over speed, especially on complex jobs like HVAC ducts or data center floors, where a wrong product can damage equipment rather than protect it.
We bring extensive experience to that balance, pairing trained staff with equipment built specifically for HVAC and data center environments. Same-day scheduling exists because buildings do not wait for ideal timing, and documented sign-offs on every job give clients proof that the scope we agreed on is the scope we delivered.
— Qadir
Get a written scope and book your deep clean
We put every deep-cleaning job in writing before we start: the tasks, the products, the timeline, and the sign-off criteria, so there are no surprises at handover. If you want a scope built around your specific property rather than a generic package, we offer consultations and scheduling options.
When you request a quote, ask for:
A site visit before pricing, not a flat quote based on square footage alone.
An itemized task list covering every area you expect to be touched.
A clear wet-to-dry sequence so floors and surfaces have proper drying time.
Proof of insurance and licensing included with the proposal.
Browse our deep cleaning services page to see current packages, or reach out directly to request a tailored scope for your home or business.
FAQ
What should be included in a professional deep-cleaning checklist?
A professional checklist covers high-touch disinfection, floor and carpet care matched to surface type, kitchen and restroom deep cleaning with dedicated tools, and documentation like SDS sheets and insurance proof. Restorative work such as floor polishing or duct cleaning is typically listed and priced separately.
How is deep cleaning different from a standard clean?
Standard cleaning maintains a space day to day, while deep cleaning reaches areas routine service skips, like behind appliances, inside vents, and grout lines. The Green Seal guidebook frames this as the difference between routine and periodic or restorative cleaning tiers.
What documents should a cleaning contractor provide before starting work?
A reliable contractor should provide a trade license, proof of Dubai Municipality external approval, public liability insurance, and SDS sheets for any disinfectants used, as outlined in guidance on Dubai cleaning company licenses. Staff identification should also be available on request.
Are HVAC duct cleaning and data center cleaning part of a standard deep clean?
No, these are specialist services quoted separately because they require specific equipment, containment procedures, and sometimes permits. Our HVAC duct cleaning guide explains why this work is handled as its own scope item rather than folded into a general deep clean.
What red flags suggest a cleaning contractor isn’t properly licensed?
Warning signs include no Dubai Municipality approval on file, use of unlabeled or unapproved chemicals, and no public liability insurance, according to KPM Global’s licensing guidance. Any contractor unwilling to share these documents before the job starts is worth questioning further.
Most homes need professional duct cleaning every 1 to 2 Year under normal conditions, but that baseline shifts fast. Pets, smokers, allergy sufferers, mold events, and recent renovations can all push the right interval down to one or two years, or trigger an immediate inspection. Before locking in a schedule, we recommend an inspection to confirm what your ducts actually need rather than guessing.
TL;DR:
Households with pets, smokers, or allergy sufferers should inspect and clean ducts every one to two years rather than following the standard three to five-year schedule.
Visible signs such as dust buildup, mold, or persistent odors indicate an immediate need for professional duct assessment, regardless of last cleaning date.
Duct cleaning that skips coils, blowers, and other components can lead to rapid recontamination, highlighting the importance of comprehensive system scope.
Routine preventive maintenance, including filter replacement and coil cleaning, can often replace scheduled deep cleaning unless inspection finds contamination or buildup.
Choosing a contractor with NADCA membership, camera inspection, and clear scope documentation ensures effective cleaning and minimizes unnecessary work.
Specializedcleaning
specializedcleaning.ae
Check Your Ducts Before Cleaning
Specializedcleaning provides professional HVAC duct cleaning in Dubai, using specialized equipment to address complex cleaning challenges.
Once you know your baseline risk level, the schedule below helps you map it to an actual calendar.
For a typical home with decent filtration, low dust exposure, and no smokers or pets, the 1 to 2 year baseline holds up well. Outside that profile, intervals compress quickly:
Pets, renters, or high-dust homes: every 1 to 2 years
Allergy or asthma sensitivity among occupants: annually, or sooner if symptoms worsen
After mold discovery, water intrusion, or flooding: immediate assessment, cleaning likely
During or right after renovation or construction: cleaning before the system runs regularly again
High-occupancy or commercial buildings: inspection on a fixed schedule, cleaning as findings dictate
A short list of triggers tells you to move up your timeline regardless of when you last had the ducts done:
A household member develops new or worsening respiratory symptoms
Visible mold or standing water appears near the air handler or ducts
Construction dust has settled into the system
A new pet or smoker has joined the household
Dust returns heavily within weeks of a filter change
In dust-prone climates or buildings with frequent nearby construction, property managers often move from the 3 to 5 year baseline to annual inspections with cleaning every 1 to 2 years for high-occupancy units.
What factors push you toward more frequent cleaning?
Not every household faces the same risk, so it helps to weigh each factor against your own conditions before deciding to accelerate.
Pets and dander: Shedding animals add hair, dander, and debris to the system continuously; homes with multiple pets or heavy shedders often warrant a 1 to 2 year cadence instead of the default baseline.
Allergies or asthma: When symptoms track closely with time spent near running HVAC, it’s worth looping in a clinician and shortening the inspection interval rather than waiting out a fixed schedule.
Mold or moisture events: A leak, flood, or persistent humidity problem calls for inspection right away, since ducts can become a reservoir for microbial growth once moisture is present.
Post-construction dust: Drywall dust, sawdust, and debris from renovation work settle deep into ductwork and rarely clear out on their own.
High occupancy or commercial use: More people moving through a space means more airborne particulate load, which justifies more frequent inspection even if cleaning itself stays on a longer cycle.
Pro Tip:Keep a simple log of filter changes, symptoms, and any water or construction events near your HVAC system. It turns a guess into a documented decision.
What are the warning signs you need duct cleaning now?
Some signals don’t wait for a scheduled inspection. Watch for these:
Visible dust, debris, or dark buildup at supply and return registers
A persistent musty or stale odor that appears only when the HVAC system runs
Allergy or respiratory symptoms that intensify specifically when the system is active
Visible mold growth, water staining, or signs of pests inside accessible duct sections
Dust returning heavily within weeks of a fresh filter or recent cleaning
Any one of these is reason enough to request a professional assessment rather than waiting for the next calendar milestone.
What does professional duct cleaning actually cover?
A proper job treats the HVAC system as a whole, not just the visible duct runs. NADCA’s recommended scope includes:
Supply and return ductwork
Coils, drain pans, and the blower assembly
Registers, grilles, and diffusers
Continuous negative-pressure containment during the work
Technicians typically combine mechanical agitation with negative-pressure vacuuming, often verifying results with a camera inspection before and after. Cleaning only the visible ducts while skipping the coils and blower is a common shortcut that leads to fast recontamination, since those components recirculate whatever was missed. Ask for before-and-after photos, camera footage, and an invoice that itemizes exactly which components were serviced. Our guide to HVAC duct cleaning services walks through this scope in more detail if you want the full picture before booking anything.
Can preventive maintenance replace full duct cleaning?
In many cases, yes. A documented maintenance routine often does more for air quality than waiting for a calendar-based cleaning:
Replace filters on a fixed schedule and choose a MERV rating suited to your household’s sensitivity level
Keep coils and drain pans clean to prevent the microbial growth that eventually spreads into ductwork
Follow ASHRAE’s inspection-driven maintenance guidance, which recommends monthly walk-through checks and semiannual tasks timed to seasonal system start-up
Escalate to full cleaning only when an inspection finds contamination, not simply because a number of years has passed
A well-documented preventive maintenance plan that covers filters, coils, and moisture control frequently proves more cost-effective than routine duct cleaning on a fixed timer. The ASHRAE/ACCA Standard 180 framework backs this inspection-first approach rather than treating cleaning as automatic.
How do you choose a qualified duct-cleaning contractor?
Once an inspection confirms you need cleaning, the contractor you choose determines whether the work actually solves the problem.
Confirm NADCA membership or an equivalent credential, and ask whether camera inspection is included before and after the job
Request a written scope that names every component serviced: ducts, coils, blower, registers, and drain pans
Verify the method includes continuous negative-pressure collection, not just a shop-vac pass through the registers
Ask for proof of insurance, references, and sample before-and-after media from past jobs
Pro Tip:Treat a flat quote offered without any inspection as a red flag. So are guarantees of specific energy savings. Reputable contractors assess before they price.
Why Dubai conditions change the maintenance math
Dust storms and nearby construction can push households well past the standard 3 to 5 year baseline for duct cleaning. Frequent dust events and ongoing building work are common accelerators here. Keeping dated photos and invoices from every inspection makes future decisions faster and better documented.
Our take: stop scheduling by the calendar
The calendar is the wrong tool for this decision. A fixed 3 to 5 year rule works only when nothing in the household has changed, and most homes change constantly: a pet joins the family, a renovation kicks up dust, a child develops seasonal allergies. The conventional advice treats duct cleaning like an oil change, due on a timer, when it behaves more like a dental checkup: necessary when there’s evidence of a problem, wasteful when there isn’t.
What the evidence actually supports is inspection-led decision-making. The NIH/DOHS fact sheet is blunt about this: ducts can become contaminated, but proof that routine cleaning reliably improves health or air quality is mixed. That’s not an argument against cleaning. It’s an argument against cleaning on a fixed schedule instead of in response to actual findings.
If you take one thing from this, prioritize a visual or camera inspection over guessing from a wall calendar. It costs less, tells you more, and keeps you from paying for work your system doesn’t need yet.
— Qadir
Ready for an inspection-led duct cleaning?
If an inspection points to contamination, dust buildup, or recontamination risk around your coils and blower, a full scope cleaning is recommended rather than a partial job.
Whatever contractor you choose, insist on a camera inspection, a written scope covering the whole system, and proof of insurance. We provide all three as standard practice, and our technicians document before-and-after conditions so you have a record for future decisions. You can review our full HVAC duct cleaning service details and request a consultation whenever you’re ready to move from guesswork to an inspection-based plan.
FAQ
How do I know if my ducts need cleaning?
Look for visible dust or debris at the registers, a musty odor that appears only when the HVAC system runs, or allergy symptoms that worsen specifically during operation. Visible mold, water staining, or pest evidence inside accessible duct sections are also clear signals that an inspection is overdue.
What time of year should you get your ducts cleaned?
There’s no universal season requirement, since the right timing follows inspection findings rather than the calendar. Many property managers schedule inspections ahead of peak cooling or heating season so any cleaning happens before the system runs at full capacity.
What health problems can dirty air ducts cause?
Contaminated ducts can act as a reservoir for microbial growth, which may contribute to allergy or respiratory symptoms in sensitive occupants. The same source notes that evidence linking routine cleaning to consistent health improvements is mixed, so symptoms are better treated as a sign to inspect rather than proof of a specific illness.
Does cleaning air ducts really make a difference?
It can, when cleaning addresses a confirmed problem like mold, heavy dust, or post-construction debris, and when the job covers the whole system rather than just the visible ducts. A partial cleaning that skips the coils and blower tends to see dust and contaminants return quickly, which is why scope matters as much as the decision to clean at all.
Getting your deposit back typically comes down to two things: a thorough, landlord-ready clean of every room and settling your final utility accounts before handover. This guide gives you a printable move out cleaning checklist, room-by-room steps, safety rules for cleaning chemicals, and the administrative tasks that keep disputes off the table.
TL;DR:
A thorough kitchen clean should prioritize degreasing the stovetop, cleaning the oven interior, and wiping down cabinets and appliances, especially the extractor hood and filters.
Bathroom cleaning must focus on disinfecting toilets, tubs, and grout lines, with descaling taps and removing soap scum, while flagging pre-existing issues to the landlord.
Carpets in bedrooms and living areas need vacuuming, and carpet shampooing is advisable for stains or odors, with walls and fixtures wiped or dusted, especially behind furniture.
Use pH-neutral cleaners for marble and polished stone floors, and consider professional polishing for floors or surfaces showing wear or permanent gray stains.
The cleaning supplies kit should include microfiber cloths, brushes, degreasers, multi-surface cleaners, bleach, gloves, and eye protection, with attention to safety rules when handling chemicals.
Specializedcleaning
Make Move Out Cleaning Easier
Specializedcleaning provides professional residential cleaning in Dubai for move out handovers and thorough property cleaning needs.
Living areas and balcony: swept floors, wiped windows and sills, removed cobwebs from corners and ceilings.
Final admin: meter readings recorded, photos taken of every room, receipts saved, keys and access cards ready.
Finish with a short walk-through: open every cabinet and drawer one more time, check behind doors for marks, and confirm nothing was left behind before you lock up.
Detailed kitchen cleaning tasks landlords check
The kitchen draws the closest scrutiny during a move-out inspection, mostly because grease and food residue build up in places tenants forget.
Empty and wipe down every cabinet and drawer, then remove any adhesive shelf liner or sticker residue with warm water and a plastic scraper.
Degrease the stovetop, clean the oven interior and trays, and wipe the extractor hood and filters.
Defrost the fridge and freezer, clean the seals and shelves, and run a cycle in an empty dishwasher before wiping it down inside and out.
Wipe countertops, backsplash tiles, the sink, and taps, then mop the floor and clean the baseboards.
Avoid the oven’s self-clean setting right before moving if you can, since it can leave a strong odor and take hours to cool before you can wipe out the ash residue.
Pro Tip:Tackle the oven and extractor hood first. They take the longest to soak and degrease, so starting there lets the solution work while you clean the rest of the kitchen.
Bathroom checklist and grout and tile care
Bathrooms lose deposits over soap scum, limescale, and grout that looks gray instead of white.
Scrub and disinfect the toilet, tub, and shower tray, then remove soap scum from tiles and glass doors.
Descale taps and showerheads with a vinegar-based or limescale remover suited to your fixtures.
Deep-clean grout lines with a grout brush and cleaner; if staining does not lift after a reasonable effort, treat it as a job for a professional grout cleaning service rather than scrubbing until the glaze wears thin.
Clean the exhaust fan cover, mirrors, and light fixtures, then sanitize the floor.
If you spot cracked tiles, a loose seal, or mold that predates your tenancy, flag it to the landlord in writing rather than attempting a fix.
Pro Tip:A paste of baking soda and water left on grout for ten minutes before scrubbing lifts most everyday staining without needing a harsh chemical cleaner.
Bedrooms and living areas: carpets, walls and fixtures
Bedrooms and living rooms are judged on carpets, walls, and the small fixtures tenants tend to overlook.
Vacuum carpets thoroughly, including under beds and sofas, and spot-clean any visible stains.
Book a carpet shampooing service if stains remain after vacuuming or if the carpet smells of pets or smoke.
Remove nails and wall anchors, wipe down walls for scuffs and marks, and clean inside every wardrobe and closet.
Wipe windows, sills, and tracks, and dust ceiling fans and light fixtures, replacing any burnt-out bulbs.
These items take longer than they look, mostly because dust and marks accumulate in spots you only notice once the furniture moves out.
Appliance and floor care by surface type
Different appliances and floor finishes need different handling, and the wrong product can cause damage that costs more than the cleaning itself.
Ovens, fridges, and dishwashers respond best to a degreaser or baking soda paste rather than abrasive scouring pads that can scratch interior surfaces.
Extractor fan filters usually need soaking in hot water with dish soap before wiping.
Marble and polished stone floors should never meet acidic cleaners: a pH-neutral stone cleaner keeps the polish intact.
Wood floors need a manufacturer-recommended wood cleaner, while tile and grout stains often respond to a dedicated grout cleaner and a stiff brush.
Pro Tip:If marble has lost its shine or grout looks permanently gray despite cleaning, a one-time professionalfloor and marble polishingvisit is usually faster and safer than DIY stripping.
What cleaning supplies to bring and the safety rules to follow
A basic kit covers almost every move-out job: microfiber cloths, a scrub brush, a grout brush, a mop and bucket, a degreaser, a multi-surface cleaner, an oven cleaner, bleach, gloves, and eye protection.
Before you reach for bleach, follow the safety guidance the CDC lays out: never mix bleach with ammonia or acidic cleaners like vinegar, since the combination produces toxic gas. The CDC also recommends cleaning a surface with soap and water first, since cleaning alone removes most germs before any disinfectant is applied.
Ventilate the room by opening windows or running a fan whenever you use bleach or strong chemical cleaners.
Prepare bleach solutions fresh and use them within the contact time the label specifies rather than storing diluted mixes.
Wear gloves and eye protection, and dispose of chemical waste according to the product label rather than pouring concentrated cleaner down the drain.
Clean before you disinfect: soap and water remove most germs on their own, and disinfecting over a dirty surface is less effective than cleaning first.
DEWA final bill, meter readings and move-out paperwork
Settling your utility account is as important to your deposit as the cleaning itself, since most landlords will not release funds until they see proof of closure.
Submit your move-out (deactivation) request through DEWA, using UAE PASS or the guest option, and pay any outstanding charges on the account.
Select your deactivation date so DEWA can take a final meter reading; according to DEWA’s move-out process, the final bill is processed within 24 working hours, and any security deposit refund follows the refund method you chose at registration.
Save screenshots of the deactivation confirmation and final bill, photograph the meter reading yourself, and request a clearance certificate if one is available.
Confirm the exact handover time with your landlord or agent so the inspection happens close to when you finish cleaning.
Schedule your deep clean after your belongings are out but before the inspection, so nothing gets re-soiled by moving boxes or furniture in between.
Common mistakes that cost tenants their deposit
Most deposit disputes trace back to a short list of avoidable oversights.
A dirty oven interior, a greasy extractor hood, or stained grout are the items inspectors notice first.
Adhesive residue left inside cabinets and burnt-out bulbs are easy to miss but easy to fix.
Stains hidden under furniture surface the moment the furniture moves, so check underneath before you call the job done.
Photograph any pre-existing damage with a timestamp so you are not charged for wear that predates your tenancy, and put any repair needs in writing to the landlord before handover.
When hiring a professional cleaning service makes sense
Some jobs are faster and safer in the hands of a specialist than tackled solo on a tight moving schedule. Professional cleaning services with experienced and licensed staff, same-day scheduling, and specialized equipment are available for marble polishing, HVAC duct cleaning, and other complex jobs.
Consider booking a pro when you are facing stubborn grout staining, a marble floor that needs polishing, a carpet that needs shampooing, an oven that has not been deep-cleaned in years, or simply a handover date that leaves no room for a full day of cleaning. A professional visit also gives you dated receipts and before-and-after photos, which strengthen your case if the landlord questions the property’s condition at inspection. You can read more in this deep cleaning service guide.
Packing and decluttering before you start cleaning
Clean last, pack first. Trying to clean around boxes and furniture means redoing work once the room is empty.
Start decluttering room by room at least a few days before your cleaning day. Sort items into keep, donate, and discard piles, and remove anything you are not taking well before the final clean, since empty shelves and drawers are far easier to wipe down than ones still holding belongings. Once a room is fully packed, do a quick sweep for small items tucked behind doors, under beds, or on top of wardrobes, places that are easy to forget until the landlord’s inspector points them out.
Label boxes by room as you pack, and move them out of the property as soon as they are sealed rather than letting them pile up in a hallway. A cluttered hallway slows down the cleaning crew (or you) and increases the chance of scuffing a wall or floor while maneuvering around boxes.
If you are getting rid of furniture or appliances, arrange collection before cleaning day so you are not cleaning around items that are about to leave anyway. The goal is a completely empty property by the time you start wiping surfaces, since that is the only way to reach every baseboard, corner, and closet shelf without obstruction.
Cleaning walls and ceilings: scuff marks and cobwebs
Walls and ceilings rarely get the attention they deserve until the furniture moves out and every mark becomes visible.
Start with ceilings and corners, since cobwebs and dust settle there and are easiest to knock down before you clean the walls below. A long-handled duster or a vacuum with a brush attachment clears most webs and dust without a ladder. For scuff marks on walls, a damp microfiber cloth with a small amount of mild dish soap lifts most everyday marks; a melamine sponge works on tougher scuffs, though it should be tested on a small area first since it can dull some paint finishes.
Work top to bottom in each room: ceiling, then walls, then baseboards, so dust and debris fall onto surfaces you have not cleaned yet rather than onto ones you just finished. Pay close attention to areas behind where furniture stood, since those spots often hide marks, dust buildup, or faded paint from sun exposure around the rest of the wall.
Eco-friendly and non-toxic cleaning methods
You do not need a cabinet full of harsh chemicals to get a property landlord-ready.
Baking soda and white vinegar handle a surprising range of jobs: baking soda lifts grease and scrubs grout, while diluted vinegar cuts through limescale on taps and shower heads (never use vinegar near bleach, for the same reason the CDC warns against mixing bleach with acids). Castile soap diluted in water works as a gentle all-purpose cleaner for countertops, cabinets, and floors that does not leave behind a strong chemical smell.
Microfiber cloths reduce the amount of cleaner you need in the first place, since they lift dust and grime with water alone on most surfaces. Keep a spray bottle of diluted castile soap and a microfiber cloth on hand for quick touch-ups between deeper cleaning sessions, and save the stronger degreasers and bleach solutions for the jobs that genuinely need them, like an oven interior or a disinfected bathroom floor.
Handling repairs and touch-ups before you clean
Small repairs belong before the cleaning, not after, since patching and painting create their own dust and mess.
Fill nail holes and wall anchor marks with a lightweight spackle, let it dry fully, then sand it smooth before touching up with matching paint. If you are not sure of the exact paint color, a small test patch in an inconspicuous spot confirms the match before you commit to a full wall. Tighten any loose cabinet handles or hinges, and replace any blown light bulbs while you are already working room by room.
Once repairs are dry and dust has settled, clean the room as normal, since painting dust and spackle residue will otherwise end up on your freshly wiped surfaces. If a repair is beyond a simple touch-up, such as a cracked tile or a damaged door, document it with a photo and notify the landlord in writing before handover rather than attempting a fix that might make the damage harder to assess fairly.
What this checklist gets right and where tenants over-invest
The checklist above works because it mirrors what actually gets inspected: ovens, grout, carpets, and utility paperwork. Where tenants go wrong is treating every surface as equally urgent. A streaky window gets noticed less than a greasy extractor hood or a stained carpet, yet people often spend an afternoon on windows and rush the oven.
The other overlooked piece is documentation. A clean property with no photos or meter-reading proof still leaves room for a dispute. A messier property with timestamped photos and a DEWA clearance receipt is in a stronger position. If you take one thing from this guide, let it be this: clean the handful of items that inspectors actually check closely, then spend the time you saved on paperwork, not on polishing surfaces nobody will scrutinize.
Conventional checklists rarely mention the admin side at all, which is exactly where disputes tend to start.
— Qadir
Book a move-out clean that is ready for inspection
Move In/Out Deep Cleaning services cover kitchens, bathrooms, appliances, floors, and the detail work landlords check at handover, helping clients avoid last-minute cleaning rushes.
Request a free consultation to scope your property before booking.
Same-day scheduling options may be available for tenants with tight handover dates.
Specialized staff handle marble polishing, grout cleaning, and carpet shampooing alongside standard room-by-room cleaning.
Book your move-out deep clean and leave the inspection-critical details to a crew that does this daily.
What should I include on my move out cleaning list?
Your list should cover every room: kitchen appliances, bathroom grout and fixtures, carpets, walls, windows, and light fixtures, plus admin tasks like meter readings and photos. The checklist earlier in this guide groups these by room so you can work through them in order.
What is the 5-5-5 rule for cleaning?
Definitions of this rule vary across cleaning guides, and no single official version applies to move-out cleaning specifically. Rather than rely on an unverified rule, use the room-by-room checklist in this guide, which covers the items inspectors actually check.
What cleaning supplies do I need when moving out?
A basic kit covers most jobs: microfiber cloths, a scrub brush, a grout brush, a mop and bucket, a degreaser, a multi-surface cleaner, an oven cleaner, bleach, gloves, and eye protection. Follow the CDC’s bleach safety guidance whenever you use it, especially around ventilation and never mixing it with other cleaners.
What are the 7 stages of cleaning?
There is no single standardized “7 stages” framework for residential move-out cleaning. A practical sequence that works well is declutter, pack, repair, clean top to bottom (ceilings to floors), disinfect bathrooms and kitchens, do a final walk-through, and document the result with photos.
Do I need a professional clean to get my deposit back?
A professional clean is not required, but it helps when you are short on time or facing stubborn grout, carpet stains, or marble that needs polishing. Services like Specialized Cleaning’s deep cleaning are built for exactly this handover window and provide receipts and photos that support your deposit claim.