Getting your deposit back typically comes down to two things: a thorough, landlord-ready clean of every room and settling your final utility accounts before handover. This guide gives you a printable move out cleaning checklist, room-by-room steps, safety rules for cleaning chemicals, and the administrative tasks that keep disputes off the table.
TL;DR:
A thorough kitchen clean should prioritize degreasing the stovetop, cleaning the oven interior, and wiping down cabinets and appliances, especially the extractor hood and filters.
Bathroom cleaning must focus on disinfecting toilets, tubs, and grout lines, with descaling taps and removing soap scum, while flagging pre-existing issues to the landlord.
Carpets in bedrooms and living areas need vacuuming, and carpet shampooing is advisable for stains or odors, with walls and fixtures wiped or dusted, especially behind furniture.
Use pH-neutral cleaners for marble and polished stone floors, and consider professional polishing for floors or surfaces showing wear or permanent gray stains.
The cleaning supplies kit should include microfiber cloths, brushes, degreasers, multi-surface cleaners, bleach, gloves, and eye protection, with attention to safety rules when handling chemicals.
Specializedcleaning
Make Move Out Cleaning Easier
Specializedcleaning provides professional residential cleaning in Dubai for move out handovers and thorough property cleaning needs.
Living areas and balcony: swept floors, wiped windows and sills, removed cobwebs from corners and ceilings.
Final admin: meter readings recorded, photos taken of every room, receipts saved, keys and access cards ready.
Finish with a short walk-through: open every cabinet and drawer one more time, check behind doors for marks, and confirm nothing was left behind before you lock up.
Detailed kitchen cleaning tasks landlords check
The kitchen draws the closest scrutiny during a move-out inspection, mostly because grease and food residue build up in places tenants forget.
Empty and wipe down every cabinet and drawer, then remove any adhesive shelf liner or sticker residue with warm water and a plastic scraper.
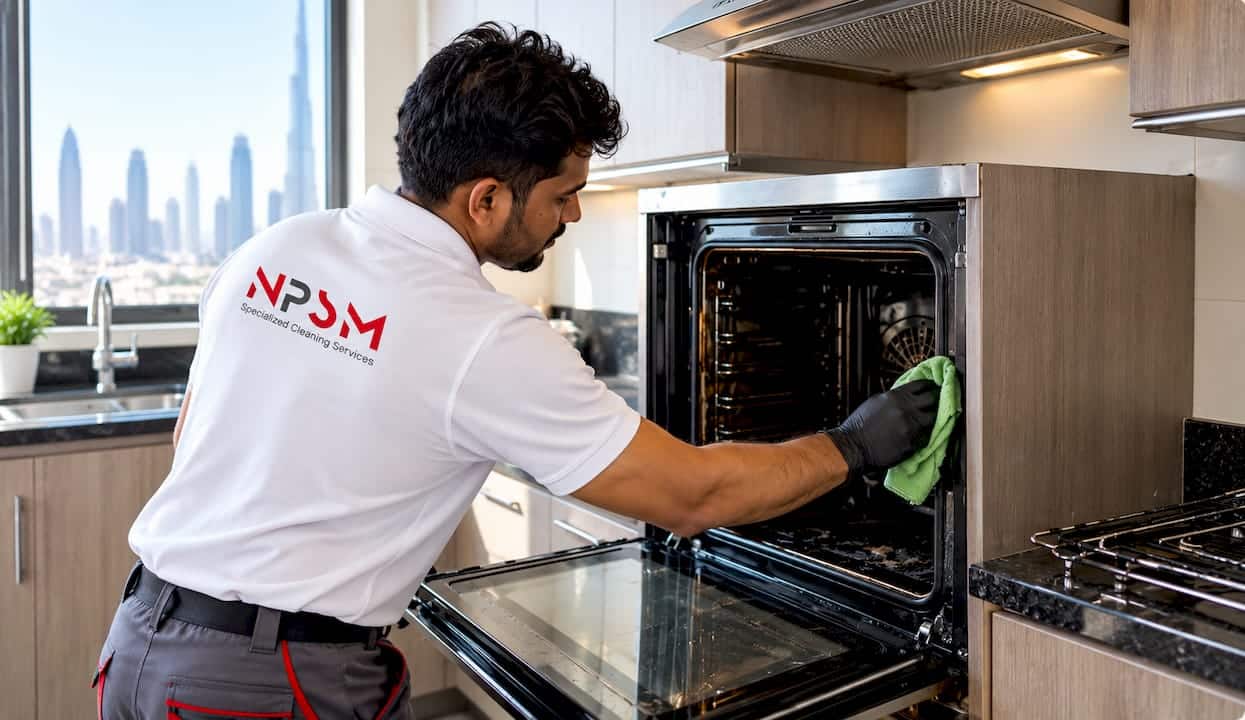
Degrease the stovetop, clean the oven interior and trays, and wipe the extractor hood and filters.
Defrost the fridge and freezer, clean the seals and shelves, and run a cycle in an empty dishwasher before wiping it down inside and out.
Wipe countertops, backsplash tiles, the sink, and taps, then mop the floor and clean the baseboards.
Avoid the oven’s self-clean setting right before moving if you can, since it can leave a strong odor and take hours to cool before you can wipe out the ash residue.
Pro Tip:Tackle the oven and extractor hood first. They take the longest to soak and degrease, so starting there lets the solution work while you clean the rest of the kitchen.
Bathroom checklist and grout and tile care
Bathrooms lose deposits over soap scum, limescale, and grout that looks gray instead of white.
Scrub and disinfect the toilet, tub, and shower tray, then remove soap scum from tiles and glass doors.
Descale taps and showerheads with a vinegar-based or limescale remover suited to your fixtures.
Deep-clean grout lines with a grout brush and cleaner; if staining does not lift after a reasonable effort, treat it as a job for a professional grout cleaning service rather than scrubbing until the glaze wears thin.
Clean the exhaust fan cover, mirrors, and light fixtures, then sanitize the floor.
If you spot cracked tiles, a loose seal, or mold that predates your tenancy, flag it to the landlord in writing rather than attempting a fix.
Pro Tip:A paste of baking soda and water left on grout for ten minutes before scrubbing lifts most everyday staining without needing a harsh chemical cleaner.
Bedrooms and living areas: carpets, walls and fixtures
Bedrooms and living rooms are judged on carpets, walls, and the small fixtures tenants tend to overlook.
Vacuum carpets thoroughly, including under beds and sofas, and spot-clean any visible stains.
Book a carpet shampooing service if stains remain after vacuuming or if the carpet smells of pets or smoke.
Remove nails and wall anchors, wipe down walls for scuffs and marks, and clean inside every wardrobe and closet.
Wipe windows, sills, and tracks, and dust ceiling fans and light fixtures, replacing any burnt-out bulbs.
These items take longer than they look, mostly because dust and marks accumulate in spots you only notice once the furniture moves out.
Appliance and floor care by surface type
Different appliances and floor finishes need different handling, and the wrong product can cause damage that costs more than the cleaning itself.
Ovens, fridges, and dishwashers respond best to a degreaser or baking soda paste rather than abrasive scouring pads that can scratch interior surfaces.
Extractor fan filters usually need soaking in hot water with dish soap before wiping.
Marble and polished stone floors should never meet acidic cleaners: a pH-neutral stone cleaner keeps the polish intact.
Wood floors need a manufacturer-recommended wood cleaner, while tile and grout stains often respond to a dedicated grout cleaner and a stiff brush.
Pro Tip:If marble has lost its shine or grout looks permanently gray despite cleaning, a one-time professionalfloor and marble polishingvisit is usually faster and safer than DIY stripping.
What cleaning supplies to bring and the safety rules to follow
A basic kit covers almost every move-out job: microfiber cloths, a scrub brush, a grout brush, a mop and bucket, a degreaser, a multi-surface cleaner, an oven cleaner, bleach, gloves, and eye protection.
Before you reach for bleach, follow the safety guidance the CDC lays out: never mix bleach with ammonia or acidic cleaners like vinegar, since the combination produces toxic gas. The CDC also recommends cleaning a surface with soap and water first, since cleaning alone removes most germs before any disinfectant is applied.
Ventilate the room by opening windows or running a fan whenever you use bleach or strong chemical cleaners.
Prepare bleach solutions fresh and use them within the contact time the label specifies rather than storing diluted mixes.
Wear gloves and eye protection, and dispose of chemical waste according to the product label rather than pouring concentrated cleaner down the drain.
Clean before you disinfect: soap and water remove most germs on their own, and disinfecting over a dirty surface is less effective than cleaning first.
DEWA final bill, meter readings and move-out paperwork
Settling your utility account is as important to your deposit as the cleaning itself, since most landlords will not release funds until they see proof of closure.
Submit your move-out (deactivation) request through DEWA, using UAE PASS or the guest option, and pay any outstanding charges on the account.
Select your deactivation date so DEWA can take a final meter reading; according to DEWA’s move-out process, the final bill is processed within 24 working hours, and any security deposit refund follows the refund method you chose at registration.
Save screenshots of the deactivation confirmation and final bill, photograph the meter reading yourself, and request a clearance certificate if one is available.
Confirm the exact handover time with your landlord or agent so the inspection happens close to when you finish cleaning.
Schedule your deep clean after your belongings are out but before the inspection, so nothing gets re-soiled by moving boxes or furniture in between.
Common mistakes that cost tenants their deposit
Most deposit disputes trace back to a short list of avoidable oversights.
A dirty oven interior, a greasy extractor hood, or stained grout are the items inspectors notice first.
Adhesive residue left inside cabinets and burnt-out bulbs are easy to miss but easy to fix.
Stains hidden under furniture surface the moment the furniture moves, so check underneath before you call the job done.
Photograph any pre-existing damage with a timestamp so you are not charged for wear that predates your tenancy, and put any repair needs in writing to the landlord before handover.
When hiring a professional cleaning service makes sense
Some jobs are faster and safer in the hands of a specialist than tackled solo on a tight moving schedule. Professional cleaning services with experienced and licensed staff, same-day scheduling, and specialized equipment are available for marble polishing, HVAC duct cleaning, and other complex jobs.
Consider booking a pro when you are facing stubborn grout staining, a marble floor that needs polishing, a carpet that needs shampooing, an oven that has not been deep-cleaned in years, or simply a handover date that leaves no room for a full day of cleaning. A professional visit also gives you dated receipts and before-and-after photos, which strengthen your case if the landlord questions the property’s condition at inspection. You can read more in this deep cleaning service guide.
Packing and decluttering before you start cleaning
Clean last, pack first. Trying to clean around boxes and furniture means redoing work once the room is empty.
Start decluttering room by room at least a few days before your cleaning day. Sort items into keep, donate, and discard piles, and remove anything you are not taking well before the final clean, since empty shelves and drawers are far easier to wipe down than ones still holding belongings. Once a room is fully packed, do a quick sweep for small items tucked behind doors, under beds, or on top of wardrobes, places that are easy to forget until the landlord’s inspector points them out.
Label boxes by room as you pack, and move them out of the property as soon as they are sealed rather than letting them pile up in a hallway. A cluttered hallway slows down the cleaning crew (or you) and increases the chance of scuffing a wall or floor while maneuvering around boxes.
If you are getting rid of furniture or appliances, arrange collection before cleaning day so you are not cleaning around items that are about to leave anyway. The goal is a completely empty property by the time you start wiping surfaces, since that is the only way to reach every baseboard, corner, and closet shelf without obstruction.
Cleaning walls and ceilings: scuff marks and cobwebs
Walls and ceilings rarely get the attention they deserve until the furniture moves out and every mark becomes visible.
Start with ceilings and corners, since cobwebs and dust settle there and are easiest to knock down before you clean the walls below. A long-handled duster or a vacuum with a brush attachment clears most webs and dust without a ladder. For scuff marks on walls, a damp microfiber cloth with a small amount of mild dish soap lifts most everyday marks; a melamine sponge works on tougher scuffs, though it should be tested on a small area first since it can dull some paint finishes.
Work top to bottom in each room: ceiling, then walls, then baseboards, so dust and debris fall onto surfaces you have not cleaned yet rather than onto ones you just finished. Pay close attention to areas behind where furniture stood, since those spots often hide marks, dust buildup, or faded paint from sun exposure around the rest of the wall.
Eco-friendly and non-toxic cleaning methods
You do not need a cabinet full of harsh chemicals to get a property landlord-ready.
Baking soda and white vinegar handle a surprising range of jobs: baking soda lifts grease and scrubs grout, while diluted vinegar cuts through limescale on taps and shower heads (never use vinegar near bleach, for the same reason the CDC warns against mixing bleach with acids). Castile soap diluted in water works as a gentle all-purpose cleaner for countertops, cabinets, and floors that does not leave behind a strong chemical smell.
Microfiber cloths reduce the amount of cleaner you need in the first place, since they lift dust and grime with water alone on most surfaces. Keep a spray bottle of diluted castile soap and a microfiber cloth on hand for quick touch-ups between deeper cleaning sessions, and save the stronger degreasers and bleach solutions for the jobs that genuinely need them, like an oven interior or a disinfected bathroom floor.
Handling repairs and touch-ups before you clean
Small repairs belong before the cleaning, not after, since patching and painting create their own dust and mess.
Fill nail holes and wall anchor marks with a lightweight spackle, let it dry fully, then sand it smooth before touching up with matching paint. If you are not sure of the exact paint color, a small test patch in an inconspicuous spot confirms the match before you commit to a full wall. Tighten any loose cabinet handles or hinges, and replace any blown light bulbs while you are already working room by room.
Once repairs are dry and dust has settled, clean the room as normal, since painting dust and spackle residue will otherwise end up on your freshly wiped surfaces. If a repair is beyond a simple touch-up, such as a cracked tile or a damaged door, document it with a photo and notify the landlord in writing before handover rather than attempting a fix that might make the damage harder to assess fairly.
What this checklist gets right and where tenants over-invest
The checklist above works because it mirrors what actually gets inspected: ovens, grout, carpets, and utility paperwork. Where tenants go wrong is treating every surface as equally urgent. A streaky window gets noticed less than a greasy extractor hood or a stained carpet, yet people often spend an afternoon on windows and rush the oven.
The other overlooked piece is documentation. A clean property with no photos or meter-reading proof still leaves room for a dispute. A messier property with timestamped photos and a DEWA clearance receipt is in a stronger position. If you take one thing from this guide, let it be this: clean the handful of items that inspectors actually check closely, then spend the time you saved on paperwork, not on polishing surfaces nobody will scrutinize.
Conventional checklists rarely mention the admin side at all, which is exactly where disputes tend to start.
— Qadir
Book a move-out clean that is ready for inspection
Move In/Out Deep Cleaning services cover kitchens, bathrooms, appliances, floors, and the detail work landlords check at handover, helping clients avoid last-minute cleaning rushes.
Request a free consultation to scope your property before booking.
Same-day scheduling options may be available for tenants with tight handover dates.
Specialized staff handle marble polishing, grout cleaning, and carpet shampooing alongside standard room-by-room cleaning.
Book your move-out deep clean and leave the inspection-critical details to a crew that does this daily.
What should I include on my move out cleaning list?
Your list should cover every room: kitchen appliances, bathroom grout and fixtures, carpets, walls, windows, and light fixtures, plus admin tasks like meter readings and photos. The checklist earlier in this guide groups these by room so you can work through them in order.
What is the 5-5-5 rule for cleaning?
Definitions of this rule vary across cleaning guides, and no single official version applies to move-out cleaning specifically. Rather than rely on an unverified rule, use the room-by-room checklist in this guide, which covers the items inspectors actually check.
What cleaning supplies do I need when moving out?
A basic kit covers most jobs: microfiber cloths, a scrub brush, a grout brush, a mop and bucket, a degreaser, a multi-surface cleaner, an oven cleaner, bleach, gloves, and eye protection. Follow the CDC’s bleach safety guidance whenever you use it, especially around ventilation and never mixing it with other cleaners.
What are the 7 stages of cleaning?
There is no single standardized “7 stages” framework for residential move-out cleaning. A practical sequence that works well is declutter, pack, repair, clean top to bottom (ceilings to floors), disinfect bathrooms and kitchens, do a final walk-through, and document the result with photos.
Do I need a professional clean to get my deposit back?
A professional clean is not required, but it helps when you are short on time or facing stubborn grout, carpet stains, or marble that needs polishing. Services like Specialized Cleaning’s deep cleaning are built for exactly this handover window and provide receipts and photos that support your deposit claim.